


ZIPPER BOW TUTORIAL PART TWO:
PEACOCK FEATHER ZIPPER BOW

Remember zipper bows are cute on adults too!
For this tutorial who will follow all the directions for the previous White Flower Zipper Bow post EXCEPT instead of rolling the excess zipper to make the center of your flower you will cut it off. If you have already read these instructions and know how to do it scroll down until you see the green zipper bow.
For this tutorial you will need:
small circle of felt(no bigger than a quarter)
scissors
zipper (I like to use a longer zipper on these kinds of bows. It's possible with a shorter zipper but much harder)
Needle and thread
Glue gun and glue sticks
Lace (optional)
Peacock Feathers (or any other feather you like)
a center piece for you bow
Ribbon lined alligator clip (Click here for that tutorial)
Remember to zip your zipper up and cut off the large metal "stopper" at the opposite end. Then unzip your zipper so that the actual handle you hold on to come off. Now you have two separate pieces! We will use both sides of the zipper in this tutorial.
Start with your felt.

For this bow your circle shouldn't be bigger than a quater. In fact I actually cut mine down to about a dime size. Either one works.
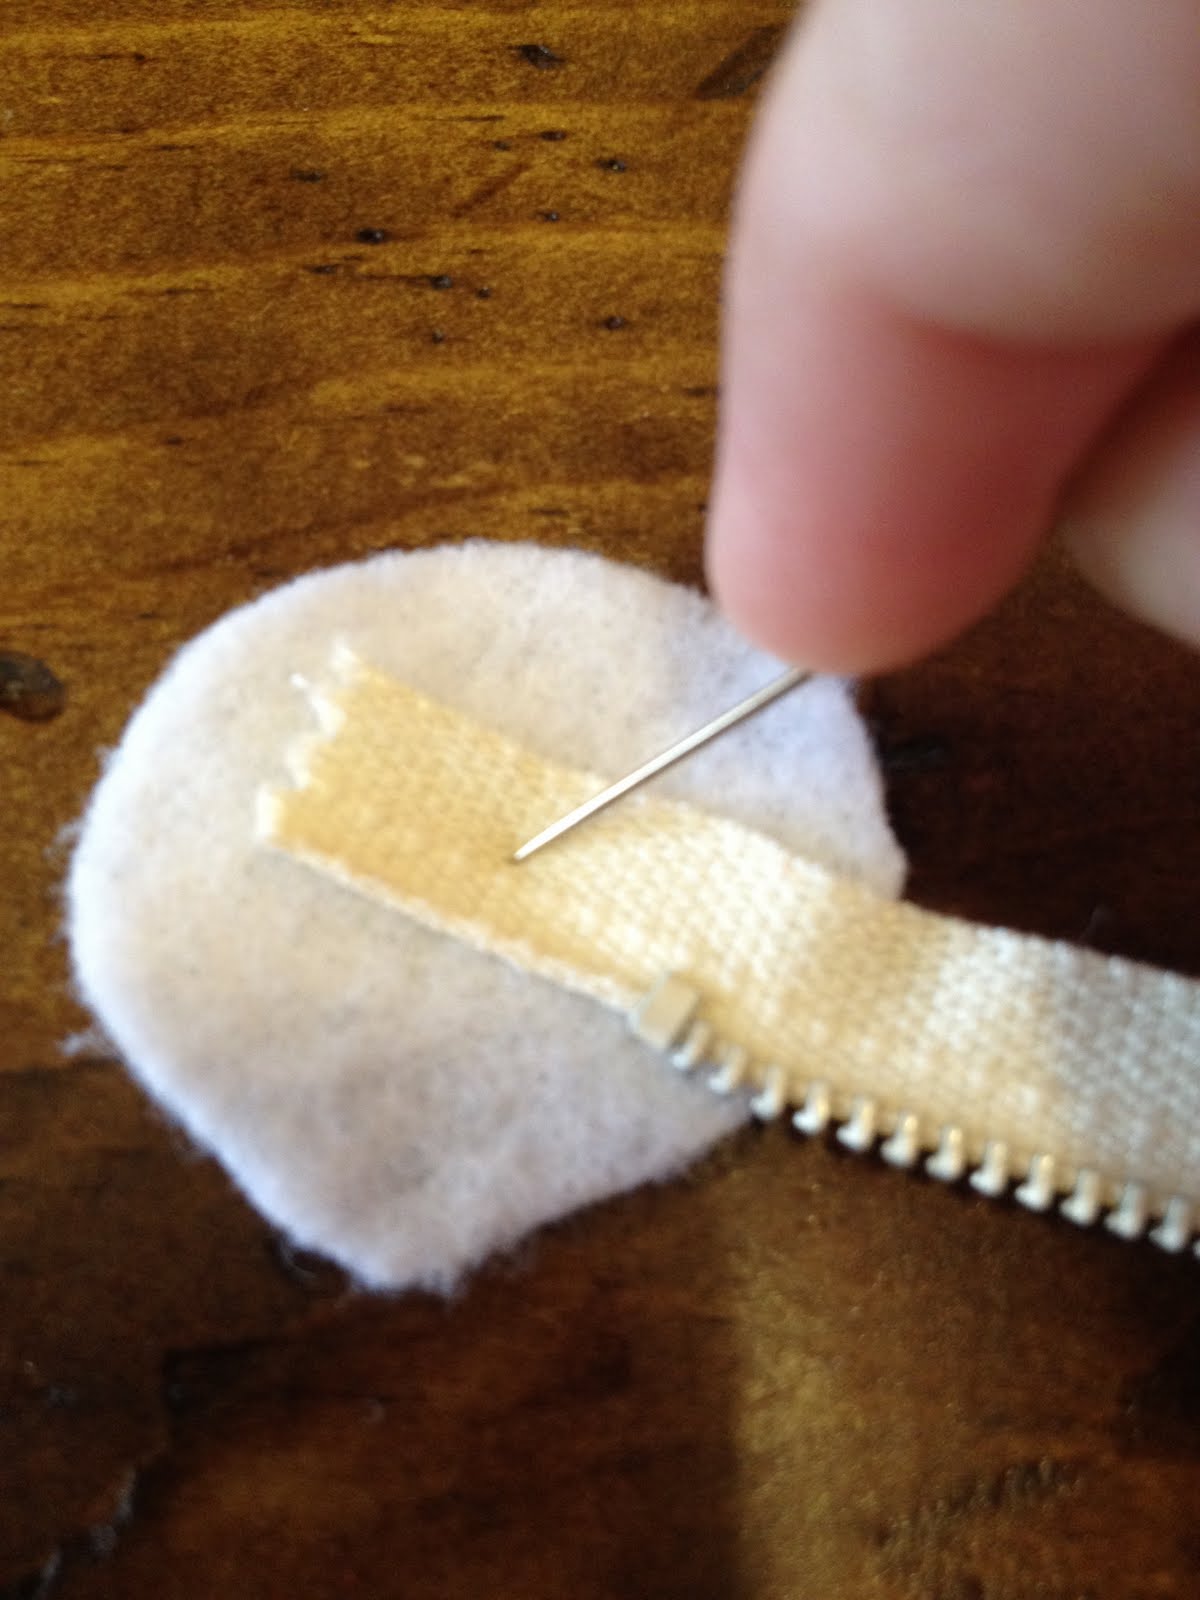
Then you will take one end of your zipper and place it in the center of your felt. Put one stitch in it. In this picture I made my first needle insertion through the top and found that once I made a full stitch and came back through it got in the way of what I was doing. So I am going to suggest you make your first needle insertion through the bottom side of your felt. One full stitch means that you will go up and through from the bottom of your felt and then back through top to the bottom keeping your needle and thread out of your way. After securing your zipper to your felt. play around to see how many petals you can make with the length of your zipper. I usually try to make about five.

After you know how big you want your petals to be make your first petal loop and secure it down with a stitch.

Make your second petal straight across from the first and secure it down with a stitch.
Then you will make your 3rd, 4th, and 5th petals. Securing each down with a stitch. I have included picture so you can see how I did mine.
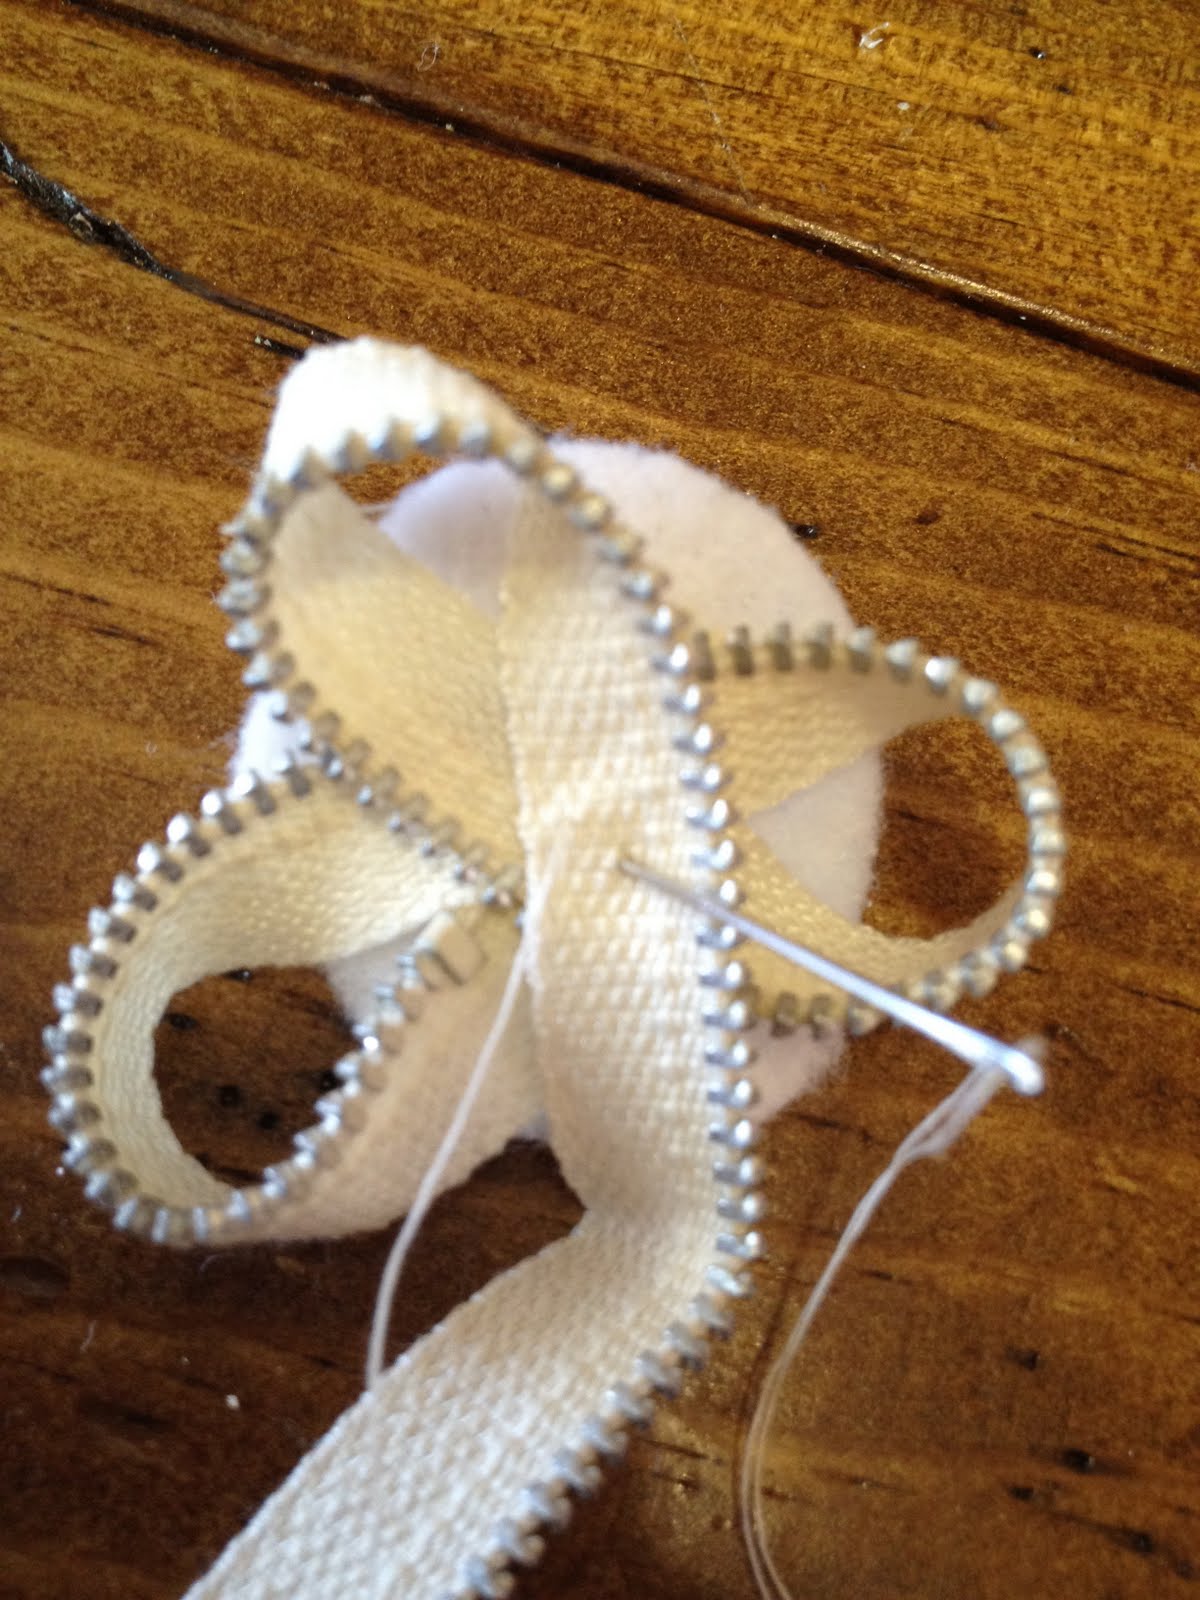
3rd petal

4th petal

and 5th petal.
Now you are going to tie off your thread to the back of your felt. If you know how to tie it off skip the next two pictures. If you don't keep reading

Put your needle through a small piece of felt and DON'T pull it all the way through.

stop when you have a small loop like this and pass your needle through that loop and pull it all the way tight. Do this 2 or 3 times to make sure it's secure.
Trim up the felt on the back side of your bow if you need to. You don't want to be able to see any of the felt when you are looking at the front of your flower.

Now turn it over.
Your petal should look like this.

Cute off the excess zipper.
Now we will start on your second petal layer

Continue all previous steps, making each petal and stitching it down until you have 5 petals EXCEPT this time you will want your petals to be just a tiny bit larger than your first row of petals you already made.
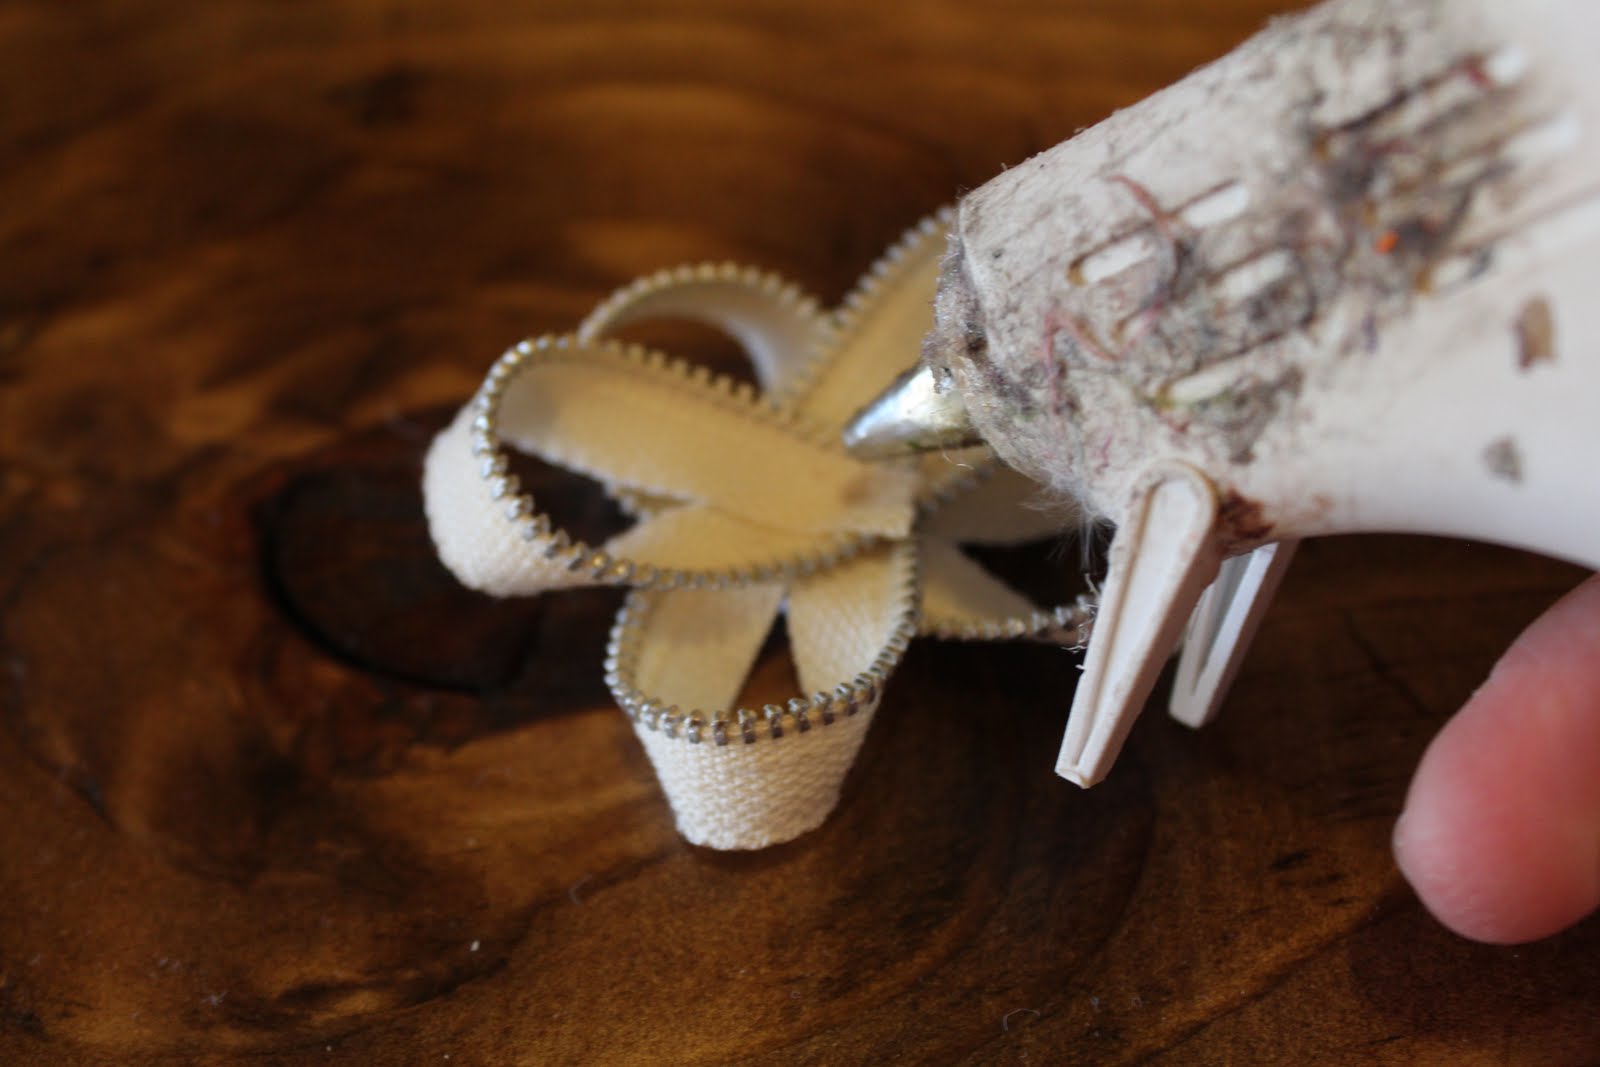
You will end up here. Cut off any excess zipper. Then put a glob of glue in the center of your 2nd layer of petals and place your first layer on top. TIP: when positioning my first layer on to my second layer I like to make sure none of my petals are directly laying of top of each other. This way the flower looks more full and like it has more petals.

Ok I am really sorry I didn't take as detailed pictures for this set of instructions but to be honest I don't think you need them. At this point you will have two layers of zipper petals with no center. Your next step is to pick out your center.
Whenever I need a center I go and grab my craft jars. In these jars, which of corse came from a garage sale, I keep all my buttons, old jewelry, broken necklaces and anything else I think would make a cute center for a hair piece.

Dig through your stuff and find a center piece you like! If it's a piece of old jewelry, for example, an old clip on earring or an old lady pin you will have to take wire cutters and cut off the back so that it will lay flat on your bow. Mine was a button that had some sort of fastner on the back of it, which I clipped off. After you find your center glue it on.
Now you can add lace if you want. The lace I used for this particular bow came from an old black bird cage veil I found at a garage sale. Here is a picture of it on Jaysa's head

When attaching lace I either cut a circle and simply glue it on the back (I usually make several layers) or I cut out a large piece in no particular shape. In fact, I usually pick up the lace with one hand so the lace is dangling and cut a piece a few inches below where I am holding it. This way my cut is totally random. Then I bunch it up bringing all loose ends to the center and glue them together. Sometimes its cute to leave some loose ends out! Totally your preference!
Now for the feathers. You can use any feathers you want, I used peacock feathers. You can place them in anyway you want to or use as many as you want just glue them to the back. Make sure they stick out far enough so that they can be seen. (you don't have to glue them smack dab in the center) After adding all the embellishments you want You will need to add an alligator clip to the back of your bow. Click here for that tutorial. After you have done this you are done and now have a cute zipper bow!
Remember, sometimes feathers can be expensive depending on the type. When your garage saleing keep an eye out for them!
Here is where my Peacock feathers came from!


Don't worry I had the same reaction! When my mom brought this to me I just looked at her like "what the heck is that?" Then she said she bought it so that I could take it apart and use the feathers. She bought the mask for .10 cents at a garage sale and since I am pretty sure I am not going to a mascarade ball any time soon I had no problem taking it apart. To be completely honest, I am not sure how expensive peacock feather are to buy in the store but I am sure it's more than .10 cents!

0 comments:
Post a Comment