


I have a fetish for fireplaces! I LOVE THEM WITH ALL MY HEART! I bought a falling apart, piece of junk fireplace at a garage sale for $5 dollars. The mantel, body and legs of the fireplace were all disassembled. With a little wood glue and and some TLC we fixed her right up. Oh! P.S. my Mom picked up this amazing vintage mirror at a garage sale for $50 for me!
I do not have a before picture! I am so sorry! This is the closest thing I could find to what it looked like before but just imagine it in 4 different pieces!

At first, I had little hope for it but for $5 dollars I was willing to give it a try. I'm so glad I did cause it has been one of my favorite projects!
To begin I primed and painted all pieces of the fireplace.

The original mantel on the fireplace stuck out about 3 feet, which was WAY to far for the space I wanted it to go in. I just wanted the mantel to be a small shelf so to fix the problem we marked off about 9 inches with a chalk line and took the circular saw to it to cut it in half.

I wanted to give it more of a distressed look. One way that I have found that works really well to expose larger pieces of your wood beneath the paint is to take a wet wash cloth and wipe your project down. After letting it soak in a bit, take a sanding block or some sand paper and lightly sand.

After all pieces of the fireplaces were painted and distressed, I pieced the fireplace back together with wood glue and metal brackets.

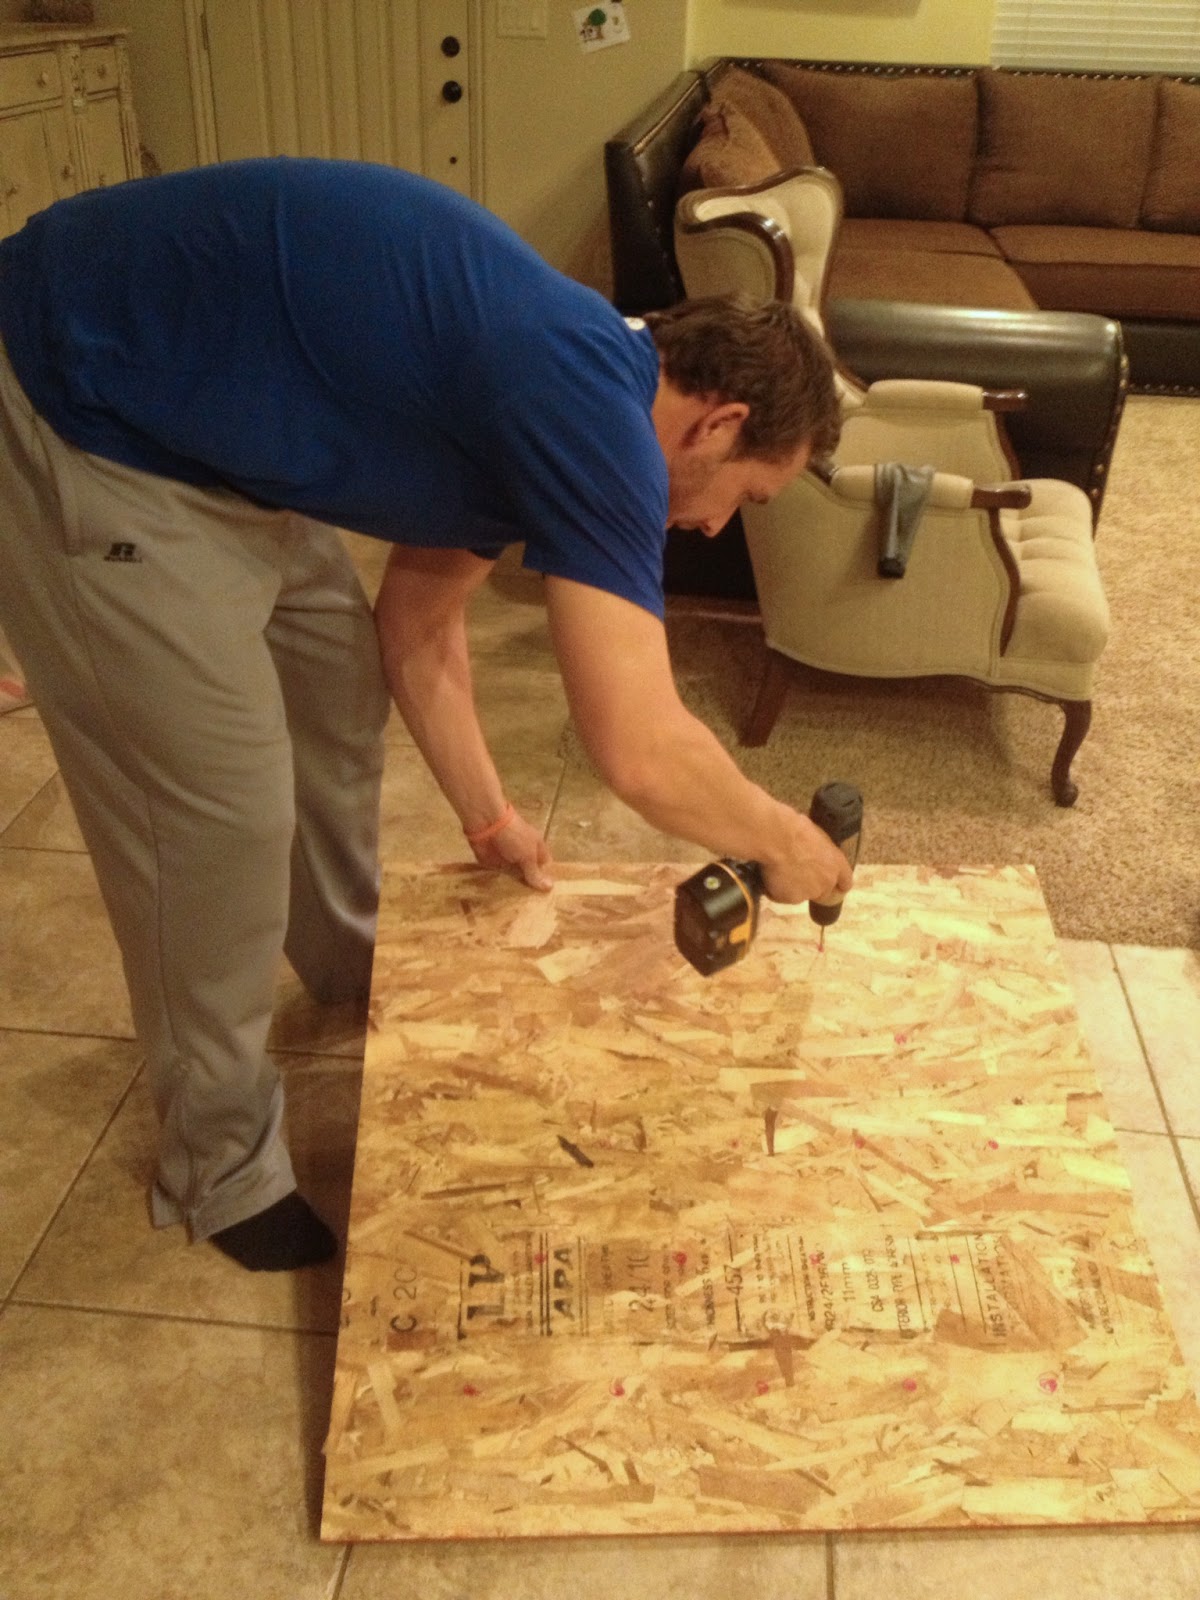
We also had to build a base for the fireplace. We started by using a 4x4 piece of wood. I wanted a little more decorative texture than just a plain 4x4 piece of wood so we used 1x2 pieces of wood and cut them into 9 and 18 inch long pieces. We then alternated the positioning of the wood to give it a more textured look. (You can't really see the 9 inch pieces in this picture but you get the idea right?)

I also added these embellishments to the end of the base which I picked up at Home Depot for a couple bucks a piece.

After staining and painting the base I again took a wet rag to it and sanded it lightly to distress the fireplace so it matched the rest of my project.
Now on to the tuffting!
For the tufting of this project I followed the tutorial found on Brooke's blog over at All Things Thrifty. CLICK HERE TO GET THERE!
I am not going to go into extreme detail in this tutorial. I want you to go to Brooke's site. She does a great job of discussing every detail and I want to give credit where credit is deserved.
**With my experience there are only two things I would do differently than Brooke. One would be where I bought my foam. ** Joanne's foam is out of this world expensive! Even with a $50 percent off coupon it will cost you an arm and a leg. Here is their pricing per thickness:
.5 inch thickness is $11.99 a yard
1 inch thickness is $18.99 a yard
2 inch thickness is $34.99 a yard
3 inch thickness is $47.99 a yard
4 inch thickness is $64.99 a yard
5 inch thickness is $79.99 a yard
I am WAY to cheap for that. What I found was that Home Depot carried a "camping pad," is what I was told it was called, which was the exact same foam at Joanne's) that is 24 inches wide, 72 inches long and 3 inches thick for $24.97. I have included a link here that will take you directly to the product. At Joanne's that would have cost $95.98. With a 50% off coupon, it still would have cost you double what you paid at Home Depot. The only disadvantage to this method is that they only have one size. They don't have anything thinner or thicker than 3 inches. I found that 3 inches was plenty thick for my project. (The second thing I did differently I will discuss a little later on in the tutorial)
From here on out I am quickly paraphrasing the next steps. Please, Please don't try to finish your project on these paraphrased instructions. It will be much to confusing. Head over to Brooke's site.
Our next step was to cut out a piece of wood that fit perfectly into the center of the fire place. Then we cut our foam to fit perfectly on top of the wood. Next you will mark off and drill holes in your foam where you want your tufts. Using a spray adhesive to make sure your foam stays in place while you work with it and drill holes in it could be a good idea. We then drilled 23 holes into our foam which was 6 inches between each hole and 5.5 inches between each row. From there you will drill holes in your wood, cover your foam with batting and finally you will be ready to work with the fabric of your project.
I want to echo something Brooke said that is very important to your tufting project. Only use the buttons with teeth. DO NOT, I repeat DO NOT EVEN THINK ABOUT trying to use the ones without teeth. If you do they will eventually start to pop off. When picking out your fabric it is also important to pick a thicker material. This will give the teeth of the button a stronger fabric to grip. I was really picky with the fabric I chose. I was hoping to find a fabric at Joanne's that I could use a coupon on but they did not have the specific color I wanted so I had to head over to Ben Franklin's. I know that sounds funny because I chose a beige and you would think that would have been easy to find but for some reason it wasn't. I really didn't want to settle on the color of the fabric (I was possibly having a really stubborn moment) so I splurged and spent a total of $45 dollars on the fabric.
COVERING YOUR BUTTONS
As you start covering your buttons you will find that there is a art to this process...actually... no art just your fingernails and a higher pain tolerance. Brooke used an eraser to help her but that didn't help me much because my fabric was so thick. When I covered my buttons I tried to get the teeth of the button to poke through my fabric on as many teeth as possible. This will help make sure your buttons don't pop off later. After covering all my buttons we were able to start tufting. **The second thing I would do differently than Brooke is instead of using a fishing line to secure the buttons I would use a weed eater plastic wire.** Its stronger, thicker, easier to hold and hurts your fingers less when you are trying to pull the string tight.
Here are my first two buttons! I did this project with my Mom and loved every second of it. She was such a sport. I am pretty sure I stabbed her a few times with the tufting needle when I pushed it through the fabric. TOTALLY ON ACCIDENT (insert mischevious smile here) Please excuse the little kid in their underwear in the back. Talk about a photo bomb!! HA!

Do you think I used enough buttons???.....I don't think so, I need a few more.

Ok I guess I went a little crazy on the buttons.

Maybe I am an idiot but I struggled figuring out how to thread the tufting needle with the button. I found these instructions that I think explain it pretty well. (CLICK HERE) In these instructions they are tufting a pillow where both sides are visible. Only one side of your project is visible so after step 5 you can use the cotton balls and tie off you weed eater wire.
Here is what the back side will look like after you are done tufting. I took this picture straight off of Brooke's blog. Please, Please, Please head over there she has an amazingly detailed tutorial!

After all buttons are securley attached you will overlap all the extra fabric to the back side, pull it tight and use a stable gun to secure it down as shown in the picture above.
After that, all thats left is to cut excess fabric off and hang it in the center of the fireplace!


I linked to:
Mon:
Tues:
Wed
Fri
Sat
sun

Really impressive!
ReplyDeleteJust beautifully done! It looks so elegant and what a great job your mom did!! Coming over from Keeping it Simple. Di@Cottage-wishes
ReplyDeleteAbsolutely LOVE this! I haven't seen anything like this before! You did an awesome job girl!
ReplyDeleteStopping over from Take a Look Tuesday, you've got some mad tufting skills! Looks great :)
ReplyDeleteThat turned out great!
ReplyDeleteThat. Is. Awesome. I love it! Julia
ReplyDeleteYour redo is beautiful! I adore the end result! Thanks for sharing!
ReplyDeleteKristy @ 3 Peppers Recipes - Crafts, Cooking & Color
This is amazing...so beautiful! I featured it on my blog tonight in Whimsy Wednesday!
ReplyDeleteCome by and link up...the party is open!
http://www.ohmy-creative.com/whimsy-wednesday/whimsy-wednesday-link-party-113/
Susan
Do you think this could work as a headboard? Minus the fireplace of course!
ReplyDeleteThis is just a stunning piece! Wanted to let you know I'm featuring this when my link party opens up tonight. Thanks so much for linking up !
ReplyDeleteThis comment has been removed by the author.
ReplyDelete