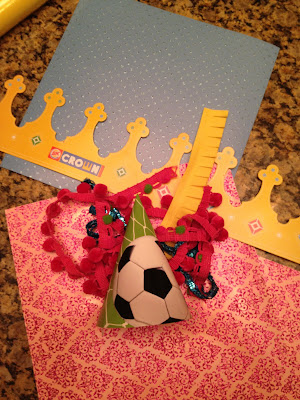
HOW TO MAKE BIRTHDAY CROWN OR HAT
You will need:
a crown or birthday hat to pattern yours after
any trim you like (I found mine at joanne's)
Cardstock scrapbook paper of your choice (for the crown you will need two pieces of paper)
Glue gun and glue sticks
Stapler
The hardest part about this tutorial will be finding all the supplies you want. The first thing you will need to do is find a pattern to base your birthday crown or hat off of. For Jaysa's crown I went to good old Burger King and asked for one of their kids crowns. For Paisley's birthday hat I went and bought a pack of 6 birthday hats for .97 cents at Walmart.
After you have all of your materials it is time to start
Lay your pattern down and trace it. With the crown I added another 2 or 3 inches to the base of the crown to make it bigger.
Then cut your crown or hat out. For the crown I did the center of my crown on my first piece of scrapbook paper and then did the two ends on another piece of paper. This way your seams are in the back.
After you have done that connect your ends. Just like in the good old days of Kindergarten I used tape and a stapler. If you do use the stapler make sure the long side of the staple is on the inside of your hat so it is less noticeable. I had a pattern that would easily hide the backside of the staples so this worked out for me. If you are using a scrapbook paper that the backside of the staple will be more easily seen or you don't like the idea of the staples you may want to try overlapping the ends a bit and then hot glue them together.
With the way I cut Jaysa's hat I had to connect her hat in three different places. As long as these are in the back you will be fine. If you have a better way of doing it go ahead and do it!
Now for the fun part of decorating your hat! I found some really cute trim at Joanne's Fabric and simply hot glued it to the bottom. For the birthday hat I also added a little pom pom I cut off some excess trim to the very top of the hat.
With the hats I used two different kinds of trim. Then I added some fabric roses to my hats. For my tutorial on fabric roses click here. I also added some left over tule from the girls' tutus.
Here is how I added my tule. I cut out a square of tule
and folded it like you would a paper fan.
With the crown I glued on my fabric flowers first and then added the tule. With Paisley's birthday hat I glued the tule to the back of her flower like this
After having your tule in place where you want it trim it up if you think it needs it.
After you are done decorating you will need to add a little elastic string to make your your hat or crown stays on. To do this I pulled off the elastic string from the soccer birthday hats I bought at Walmart and tied the ends in knots.
Bad picture but you get the idea. Then I took the hot glue gun and glued them to the inside of the sides of your hat or crown.
After I finished Jaysa's crown I decided I didn't like the color of fabric roses I used so I tore them off and made different ones. Here is my finished product!
Birthday Hat
Birthday Crown
I Love how they turned out!
To learn how to make any of the other props I used in my girls birthday pictures choose from the following:


0 comments:
Post a Comment