Voting has closed! There were so many good projects and I seriously hope I made it into the top 10!
This week for my One Artsy Mama Craft Contest the topic was mod podge. I had plans for every other topic of the contest except this one. Since I sent in my mod podge dressers (Click Here to see them) to make the top 20 to be able to compete I was not sure what I would do for this project. I didn't know if I wanted to do another dresser or even what dresser I would use or if I wanted to do something else. I knew my sister-in-law had the cutest little antique vanity in her garage she was wanting to redo. However she is about 38 weeks pregnant and didn't know when she would get around to the dresser so I asked her if I could redo it for her. After talking with her about it I had my project decision! Here she is.
It has been a while since I had seen the vanity and I thought I wanted to replace the hardware but when I saw it again I LOVED the existing hardware and decided to keep them the way they were.
To start the project I headed to the scrapbook paper store with a little something in mind. I wanted to use a paper that had some really pretty cursive writing on it. I found a really pretty blue script paper that was perfect! So I came home and gave the vanity a fresh coat of paint. I used an off white paint.
Here is the mirror.
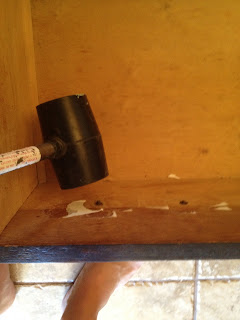
After my paint was on it was time to mod podge. I took the existing hardware off of the drawer fronts. These handles were not a normal bolt and screw handle. After looking at them I was a little worried I would not be able to take them off but I went and got a rubber mallet and gave them a few hard taps and they came out fine.
Then I started to mod podge my paper on. When you are mod podging scrapbook paper on to anything you want to put a thin layer of mod podge on and then immediately start rubbing the air bubbles that form under your paper. I have a vinyl applicator that I like to use but if you don't have this a credit card will work fine.
For a more in depth tutorial on how to mod podge paper onto dresser drawer fronts (Click Here)
After my paper was on I took a medium girt sanding block and started to rough up the edges of the vanity to give it some age.
I love the look of aged furniture. Here is a picture before aging
Here is a picture after using my sanding block to age the wood. It adds so much character!
Here is my dresser after all my paper is on.
Now for the mirror there was an imprint of where an old wood embellishment had been. It didn't look good just painted so I ran to Lowes and bought one of their wood embellishments to put on.
The wood embellishment comes as unfinished wood so I gave it a coat of paint, added some wood glue to the back, secured it in place with a C clamp and let it sit for a few hours.
After it was dry I added a little bit of glaze to the detailing.
Then I used my sanding block on the mirror and then screwed my mirror back on. Don't forget that after aging your wood you need to seal it with a polyurathane! After you give your project a coat of polyurathane it may feel sticky. If it does take a fine girt sanding block or sand paper and sand it down. This will take the sticky feeling out of your project.
Here is my before again.
After
I LOVE how it turned out! I am actually really sad that I have to give it back now! The decor of top of the dresser is from garage sales! The white statue was given to me by my mom who found it at a garage sale for a few bucks. The little vintage perfume bottle I found at a garage sale for $1 and the old teal rusted pot was also $1 at a garage sale.


It turned out beautifully!!
ReplyDeleteThank you so much Pamela!
DeleteI've never seen a project like this! It's great! I love the blending of the painted paint with the modge podged drawer fronts and top!
ReplyDeleteTammy, Thank you so much! Happy I could be original!
DeleteThis seriously turned out great! I need kids so that I can dec out their rooms & stuff lol
ReplyDeleteHa Ha Ha your so funny! That will be so fun! I love decorating baby rooms!
DeleteI love reclaiming pieces and making them your own. Though not mod podge, I did something very similar with a water damaged antique nightstand bought very inexpensively at auction.
ReplyDeleteYes this is a great technique for covering water spots! I have never been to auctions. I might have to give it a try.
DeleteI have a few questions? do you put polyurethane over the mod podge, or will it mess it up? and also did you prime it first? i always thought you have to prime before painting over stain? i love love love this!!! i wish i was talented!
ReplyDelete