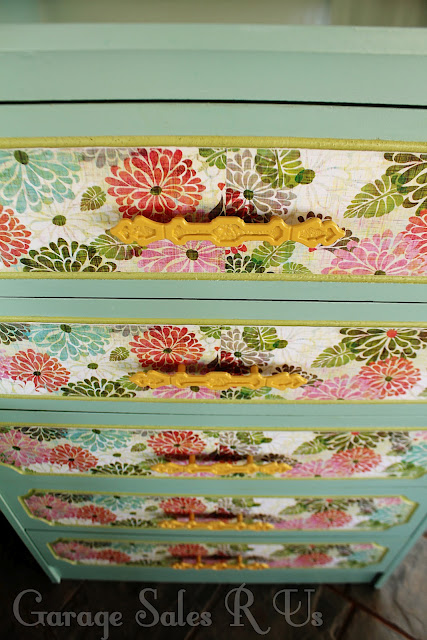
HOW TO MOD PODGE DRESSER DRAWERS.
Mod podging scrapbook paper onto a dresser is a great way to give an old piece of furniture a new look. My most popular post has been this set of mod podged dressers I re-did a while back.
Mod podging these dressers was actually really fast and simple because I didn't have any edges to wrap my paper around. However most drawers are not this simple. What if you do need to wrap your paper around the edges of your drawer? I will tell you how. Here are two projects I have done since that I have had to wrap scrapbook paper around the edges of the drawers.
Here's another small set of drawers that I am also using to house all those little pesky toys that get lost.
For this tutorial you will need:
CARDSTOCK scrapbook paper
plenty of mod podge
a wet rag
scissors
Vinyl applicator (credit card would work too)
First you will put a layer of mod podge on the front flat surface of your dresser drawer. Do not do the edges yet.
Then lay your paper on top of it making sure your paper is straight. With your vinyl applicator or credit card push out all the air bubbles by starting in the center and scraping outward. You don't have to do this really hard. Use an average amount of pressure when you do this. Keeping your scrapbook paper from bubbling can be hard. Be patient. You want to continue pushing out air bubbles until the mod podge begins to set. If you see an air bubble forming take your hand and place it over the air bubble. Put some pressure on it and try to rub the air bubble out in a circular motion. Continue doing this until the paper adheres to the drawer.
After you have your paper on and all the bubbles have been worked out you will want to press your paper down to crease it where your edges begin.

You will be creasing it in three places.
Run you finger inside the groove to make your first 2 creases more visible. I actually did not make my second crease. Then fold it over and press the paper against the back of the drawer as shown in the picture.
Your paper should look like this when you are done.
Your third crease will be a guideline showing you where to cut your paper. Here is how I cut mine. On the corners I followed my third crease but in the middle I cut about 1/2 an inch below the crease. This allows the middle to still be able to wrap around to the back of my drawer making sure that my paper wouldn't come off easily. It also helps to make doing your corners a lot easier.

I have two videos to explain you next few steps however I skipped an important step so read this next little bit before you start the videos. Your next step will be to start mod podging your paper onto the corners of your drawer. You will want to do one side first. After you have your first side done you will make and incision on the corners of your paper so that you can finish the other three sides.


Here are two videos to help you understand how to complete the next steps
How to do the edges of your drawer
How to do the corners of your drawer
Once you are done with your corners put a thin layer of mod podge over the entire drawer front. Make sure to watch for bubbling. If bubbling does occur you can work out your bubble the same way you did when applying your paper but this time you NEED TO MAKE SURE YOU HAVE MOD PODGE ON YOUR FINGERS BEFORE YOU TOUCH YOUR PROJECT! Once you feel your mod podge getting too sticky apply more. You want to make sure your fingers stay lubricated. (the best word I can think to use) If you don't you will pull off the layer of color to your paper. If a bubble is not working out don't freak out your paper expands when it is wet and will contract again once it dries.
If you work your paper too much there is a chance that you can pull the top layer (layer with all your beautiful colors) off. Do your best to not let this happen. If it does here is what you do.

I worked my paper a little bit to much on this corner. To fix this take a small strip of paper
If you work your paper too much there is a chance that you can pull the top layer (layer with all your beautiful colors) off. Do your best to not let this happen. If it does here is what you do.

I worked my paper a little bit to much on this corner. To fix this take a small strip of paper

After your scrapbook paper is all dry you will put your handles back on your drawer. To do this take a
nail and push it up through your paper from the inside of your drawer. The point of the nail helps to stop excess ripping of your paper.

After you have made your holes with a nail you can then put your handles on.


Ahhh, this is such a fantastic idea. Great tutorials! All of the dressers are so lovely. :-)
ReplyDeletegreat tutorial! nice splash of color! I have an ikea dresser...maybe laminate...would the mod podge stick to that?
ReplyDeleteAdore these dressers! Can't wait to find me a nice treasure at a garage sale to do some Mod Podging. Where do you find your handles?
ReplyDeleteThese are lovely! What a great tutorial... so easy to follow.
ReplyDeletelove this tutorial!!!
ReplyDeleteIk vond dit bericht useful.I probeerde om dit te vinden. Erg verfrissend te nemen van de informatie. Thanks a lot
ReplyDeletehttp://www.inuwtuin.nl/terrasoverkapping
Thanks for this awesome tutorial, looks great! I featured this DIY project on my blog with link credit.
ReplyDeleteHey guys.... this is such a great project and amazing idea... i am so inspired to try this myself.. I would love to share this project on my blog for my readers. Hope you dont mind.... following you..http://www.nicksnacksbyme.blogspot.com/
ReplyDeleteHello! I just wanted to let you know that I posted the URL to this tutorial on my blog. If you have any problems with that, just let me know! Thank you!!
ReplyDeleteDot
ZzzonkOwl.blogspot.com
Hi there, I have been wondering whether to order wallpaper to decorate furniture and toys, but also wondered if I could achieve a similar effect with scrapbooking, origami or laser printed paper. It is much easier to get good scrapbooking paper here and wallpaper or contact paper is hard to find and expensive. I prefer a matte look and love the retro wallpaper designs. Do you have any advice?
ReplyDeleteI'm just not understanding how the cuts are made. I see one cut in the corner but I'm not understanding how it wraps around the corner so perfectly.
ReplyDeleteThis may be a dumb question, but in the event that you need to use more than one sheet of paper, how do you mesh them together without it being obvious?
ReplyDeleteHi, I love this. I am going to give it a go myself. I would also like to share this article/blog on my online magazine. Would that be okay? Let me know, I am sure our readers would love this :-) Thank you
ReplyDelete