TutorialsPhotobucketSponsorsPhotobucketPhotobucketPhotobucket

PhotobucketPhotobucketPhotobucketPhotobucketPhotobucket
Photobucket Photobucket Photobucket Photobucket

Monday, March 5, 2012

DIY Tutu

HOW TO MAKE TUTU'S

First off, I did not get any of these materials from a garage sale but I am all about getting things for cheaper so when I decided I wanted to have my girls wear tutu's in their birthday pictures I knew there was no reason to go out a spend a fortune on a tutu when I could make it myself.

Here is what you will need:
Sewing Machine or if you don't have one just a needle and thread will do
Tule of your choice
1/2 or 3/8's inch elastic
scissors
Lighter or matches

You can buy elastic by the yard and it is much cheaper! Here is some 3/8's inch elastic and it is .79 cents a yard. You don't even need a 1/4th of a yard so your elastic shouldn't cost much.
I choose some of the more exciting tules. I used a pink and yellow that were thicker and had bigger holes than your average tule did.
My teal tule was shimmery and my green had sparkles in it.
After you have your supplies you will need to determine how much elastic you will need. I did this by measuring my girls waist with it. When you are measuring pull the elastic tight because as you begin to add your tule on your elastic will begin to stretch. If you don't pull it tight your tutu will be too big.

I didn't get a picture of this step but next you will take a lighter and melt (NOT BURN) both ends to make sure your elastic will not fray.

Next you will sew your end together. If you don't have a sewing machine hand stitching it will be fine.

Here is what mine looked like when I was done. You can sew it however you want as long as you know it will stay.

Next I cut my tule into 1.5 to 2 inch strips. To determine how long you need the tule hold it up to your child to see what length is best. When you buy fabric off the bolt it comes folded in half. I layed my tule on the ground, keeping that original fold and cut my strips. For my three year old I took each folded strip and cut it in half. For my one year old I cut it into thirds.
After you have your strips all cut and your elastic sewn you will take a strip and fold it in half as shown in the picture below
Then you will lay your strip of tule just how it is on the top of your elastic
(My elastic was too big. It started folding over itself but I didn't want to go buy anymore so I made it work) After you lay it down you are going to wrap the tail end under and to the back of the elastic and push it through your loop. Then pull it tight.

It should look like this...

From there you will continue to do this until your elastic if full of tule.
When your finished you have a cute tutu!
You can add ribbon to hide the knots of tule and help keep the elastic from showing through but I had plenty of tule and liked the way the knots looked without the ribbon. If you want to add a ribbon here is what you need to do. Choose a ribbon that is 1/2 an inch to an inch wide. For Jaysa's tutu, who is 3 years old, I used about 6 feet of ribbon. I would have liked to have a 7 or 8 feet though. I didn't have quite enough to make my bow at the end every big. For a one year old tutu I would say use about half to 2/3rds of the 7-8 feet for Jaysa's.
To start find the middle of your ribbon and lay it on top of your tutu.
Then you will separate your tule and push your ribbon back and toward the inside of your tutu. Then bring it up through the center and back around to the front where you started.
Continue lacing up this side of your ribbon around your tutu until you have about a foot left of ribbon. Then start lacing the other side until it meets up with the side you previously finished. Ideally, you would have about a foot on this side left too but it's possible you may not. It doesn't really matter as long as you have enough ribbon to make a bow.
If your short on one side unlace it a little bit and lace up the side that you have extra ribbon on until it meets again and you have even amounts of ribbon left. Then you will tie a bow with it and cut off the excess ribbon. My bow is a little small and short. I would have liked to be able to make the loops of my ribbon bigger and the tails of my ribbon longer. You will also want to melt the ends of your ribbon with a lighter or match to keep them from fraying.

To learn how to use any of the other props I used in my girls birthday pictures choose from the following:

DIY Birthday Onesie

HOW TO MAKE A BIRTHDAY ONESIE
You will need:
a onesie or fitted shirt
number of the age of your child on paper
fabric of you choice
needle and thread
Sewing Machine


First off you have to find a onesie or fitted t-shirt in your child's size. Paisley's onesie came from a garage sale and Jaysa came in a pack of three from Walmart for about $8. They were actually a 2T but I have bought those onesies before and know that they are ridicoulsly big! I knew that a 2T would fit my 3 year old. If you are going to Walmart to buy your onesie buy a smaller size or even open up the box so you can see how big the onesie is. The other thing that I thought would be cute was to do a colored onesie but those might be hard to find.
After you have your onesie you will have to find the number of their age in a cute font you like. I simply google imaged "number 1" and "number 3" and found exactly what I was looking for. Print out the number you like and then cut it out.
After you cut it out place it on your onesie to make sure it fills out the chest of the onesie and looks proportionate.
Then you will place your number on the bias of your fabric. The bias is the direction in which the fabric is the stretchiest. This will make it easier for you when you are sewing your number onto your onesie. At first I was a little worried about my pattern if I cut out my number diagonally but it turned out just fine. You couldn't even tell. If you have a fabric that will not look ok when cut on the bias thats ok. You will just need to do a really good basting stitch and go really slow when using the sewing machine. It may be a little harder because you are sewing something that is not very stretchy onto a onesie, which usually has a good amount of stretch but it can be done.
Pin your number to your fabric to make sure it doesn't move while you are cutting it out
Now you will place your number on your onesie. Make sure it is in the center of the chest and not too close to the neck line or too low that the tutu will cover up your number.
After you have determined where you want it you will do a basting stitch along the boarder of the number. If you want you can make the stitches that are shown on top of you fabric smaller and the ones shown on the inside longer or you can just cut out the basting stitch once you have done a zig zag stitch with your sewing machine.
When you are doing your basting stitch make sure that your stitches are not to tight. If they are your number will start to bunch in certain areas. If it is take your needle and run it under your most recent stitch and pull up. Continue doing this to each stitch until your number lays perfectly flat again.

I made my stitches on top really small and my stitches on the inside bigger. Just so you have an idea of how it looked here is how the inside of my number looked.

After you have your basting stitch finished then you will use your sewing machine to do a zig zag stitch along the border of the number. GO SLOW if you need to! I originally only wanted to go around my number once but I was using a friends machine because mine was in the shop and it only had one speed, lightening fast! The first time I went around my number I got off track a few times so I ended up going over mine about three times to make sure it was secure. If you have never used a sewing machine here is a tip or two. Don't try to go around the corners while the sewing machine is sewing. When you get to a corner make sure your needle is down. Pull up the lever that moves the foot of the sewing machine up and turn your onesie so that you will be sewing in the correct direction again. It is much harder to try to make that turn while the sewing machine is going.
Here is a picture of the foot of the sewing machine
In this picture the foot is up.
After you have your number sewn on YOU WILL NEED TO IRON your number. DO NOT skip this step it makes a world of difference. After I had finished sewing my number I was a little unsure if I liked the way it looked but after ironing my number it looked much better.

DIY Birthday Hat and Crown

HOW TO MAKE BIRTHDAY CROWN OR HAT

You will need:
a crown or birthday hat to pattern yours after
any trim you like (I found mine at joanne's)
Cardstock scrapbook paper of your choice (for the crown you will need two pieces of paper)
Glue gun and glue sticks
Stapler

The hardest part about this tutorial will be finding all the supplies you want. The first thing you will need to do is find a pattern to base your birthday crown or hat off of. For Jaysa's crown I went to good old Burger King and asked for one of their kids crowns. For Paisley's birthday hat I went and bought a pack of 6 birthday hats for .97 cents at Walmart.
After you have all of your materials it is time to start
Lay your pattern down and trace it. With the crown I added another 2 or 3 inches to the base of the crown to make it bigger.

Then cut your crown or hat out. For the crown I did the center of my crown on my first piece of scrapbook paper and then did the two ends on another piece of paper. This way your seams are in the back.

After you have done that connect your ends. Just like in the good old days of Kindergarten I used tape and a stapler. If you do use the stapler make sure the long side of the staple is on the inside of your hat so it is less noticeable. I had a pattern that would easily hide the backside of the staples so this worked out for me. If you are using a scrapbook paper that the backside of the staple will be more easily seen or you don't like the idea of the staples you may want to try overlapping the ends a bit and then hot glue them together.
With the way I cut Jaysa's hat I had to connect her hat in three different places. As long as these are in the back you will be fine. If you have a better way of doing it go ahead and do it!

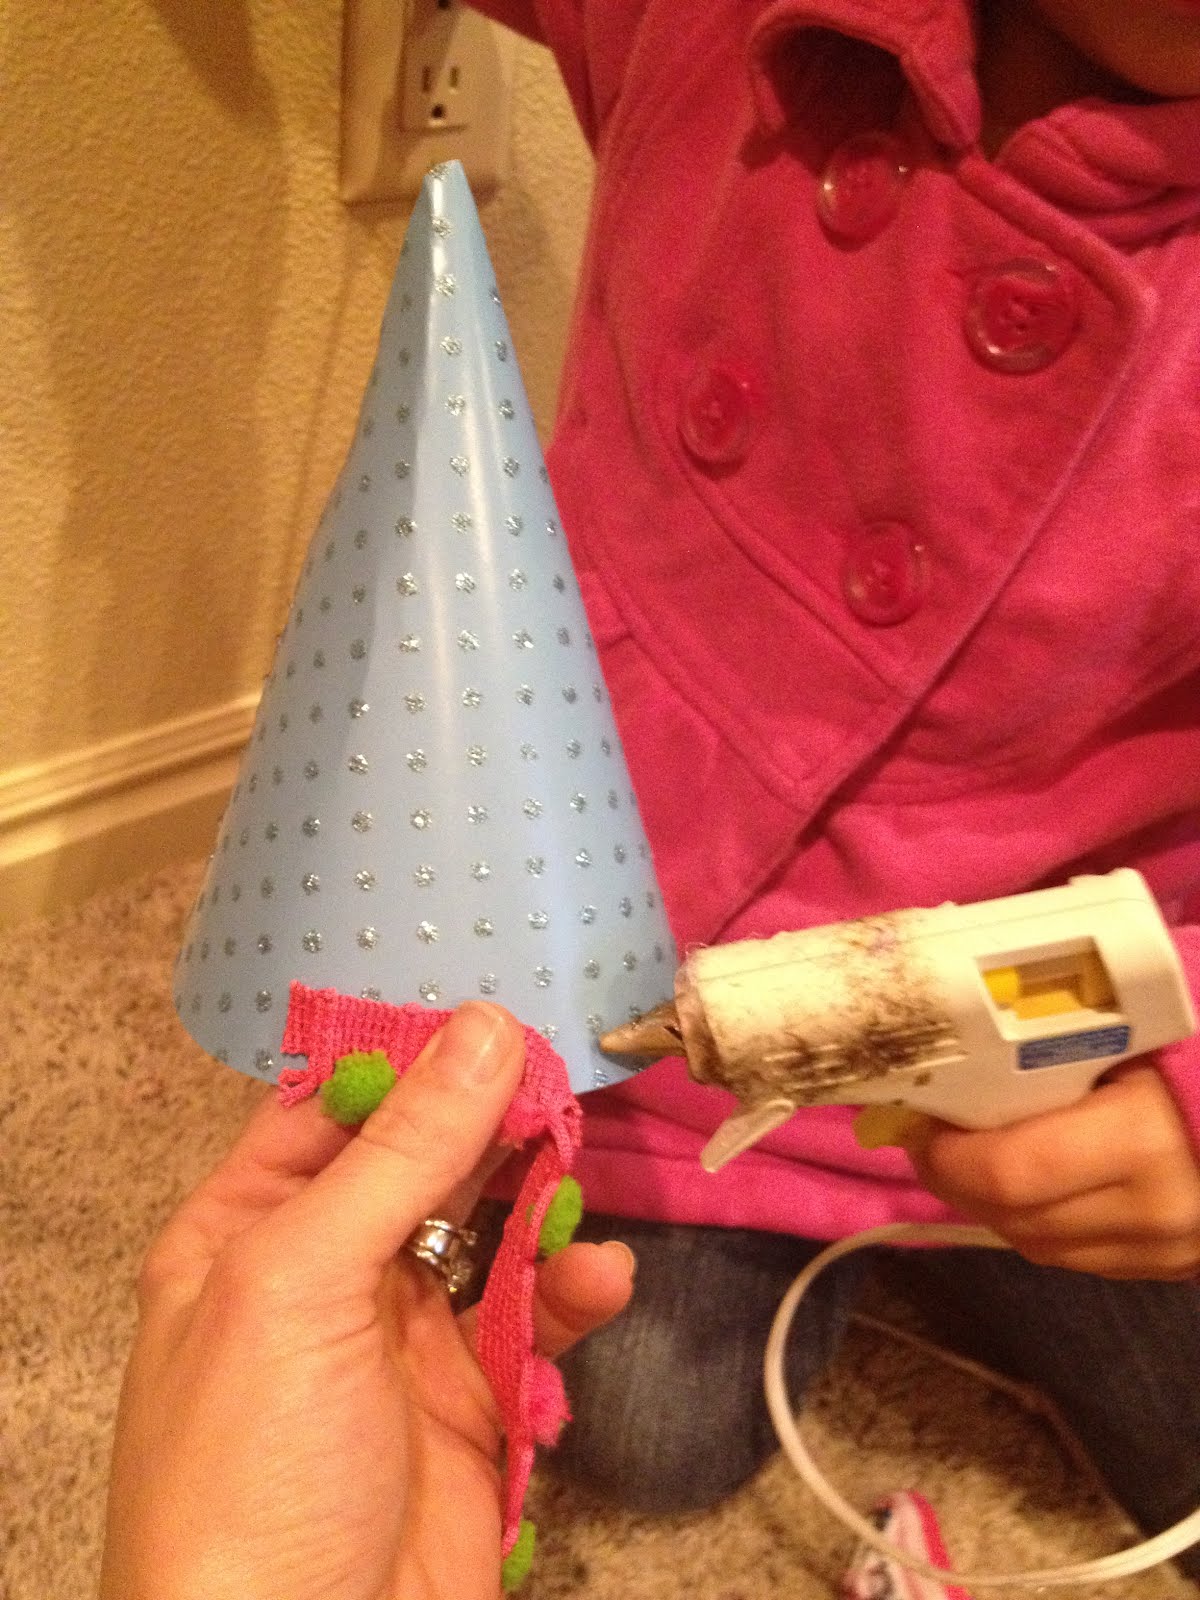
Now for the fun part of decorating your hat! I found some really cute trim at Joanne's Fabric and simply hot glued it to the bottom. For the birthday hat I also added a little pom pom I cut off some excess trim to the very top of the hat.
With the hats I used two different kinds of trim. Then I added some fabric roses to my hats. For my tutorial on fabric roses click here. I also added some left over tule from the girls' tutus.
Here is how I added my tule. I cut out a square of tule
and folded it like you would a paper fan.
With the crown I glued on my fabric flowers first and then added the tule. With Paisley's birthday hat I glued the tule to the back of her flower like this
After having your tule in place where you want it trim it up if you think it needs it.
After you are done decorating you will need to add a little elastic string to make your your hat or crown stays on. To do this I pulled off the elastic string from the soccer birthday hats I bought at Walmart and tied the ends in knots.
Bad picture but you get the idea. Then I took the hot glue gun and glued them to the inside of the sides of your hat or crown.

After I finished Jaysa's crown I decided I didn't like the color of fabric roses I used so I tore them off and made different ones. Here is my finished product!

Birthday Hat

Birthday Crown

I Love how they turned out!

To learn how to make any of the other props I used in my girls birthday pictures choose from the following:

Tissue Pom Pom Tutorial

TISSUE POM POM TUTORIAL

For this tutorial you will need:
one to two packages of tissue paper
craft wire
Something to hang your pom pom with (I used fishing line)

I could not believe how easy and cheap these tissue pom poms were to make! The big blue pom pom cost me $2 dollars and the small one cost me $1. I read a tutorial on the Martha Stweart website but I wanted mine to be a little bit more full than the pom pom they had. I followed all the same directions except I added another package of tissue paper. Here is how I did mine.
I bought two packages of blue tissue paper at Walmart for .97 cents each.
Then I laid them out flat.
and began to fold them like I was making a paper fan. Making one fold forward and one fold backward or as the Martha Stewart website called it an "accordian fold."
Take your second package of tissue paper and do the same. After you have both packages of tissue paper folded like a paper fan lay them on top of each other.

Then you will take some craft wire and twist it around the middle to secure it. If you are going to be hanging your pom pom this would also be the time to attach your string, ribbon or wire to your pom pom. I used some fishing line from one of my husbands fishing poles :0 shhhhh!
After you do that you will cut the ends off, rounding them like the picture shows.
Next you will begin to seperate your layers of tissue paper.
Bring your top layer of tissue paper all the way out to the front.
Continue shapeing your pom pom until all the layers are seperated and you have a nice and full pom pom ball.

If you want a smaller pom pom you will follow the same directions except once you have your tissue paper folded like a paper fan you will cut in half.
Then you will lay both sides on top of each other and twist your craft wire around it to secure it. After you have secured your tissue paper with your craft wire you will also need to add your ribbon, fishing line, or whatever you are hanging it with.
Now you will begin to seperate your layers just like you did with the bigger pom pom ball.
To attach these to the ceiling I just tied my fishing line around a screw and screwed it into the ceiling.

Here is a closer look at the pom poms! In this photo session we took out pom poms outside! I loved the look they gave!


To learn how to make any of the other props I used in my girls birthday pictures choose from the following: