TutorialsPhotobucketSponsorsPhotobucketPhotobucketPhotobucket

PhotobucketPhotobucketPhotobucketPhotobucketPhotobucket
Photobucket Photobucket Photobucket Photobucket

Thursday, January 26, 2012

Zipper Bow Tutorial Part Two: Peacock Feather Zipper Bow

ZIPPER BOW TUTORIAL PART TWO:
PEACOCK FEATHER ZIPPER BOW
Remember zipper bows are cute on adults too!

For this tutorial who will follow all the directions for the previous White Flower Zipper Bow post EXCEPT instead of rolling the excess zipper to make the center of your flower you will cut it off. If you have already read these instructions and know how to do it scroll down until you see the green zipper bow.

For this tutorial you will need:

small circle of felt(no bigger than a quarter)
scissors
zipper (I like to use a longer zipper on these kinds of bows. It's possible with a shorter zipper but much harder)
Needle and thread
Glue gun and glue sticks
Lace (optional)
Peacock Feathers (or any other feather you like)
a center piece for you bow
Ribbon lined alligator clip (Click here for that tutorial)

Remember to zip your zipper up and cut off the large metal "stopper" at the opposite end. Then unzip your zipper so that the actual handle you hold on to come off. Now you have two separate pieces! We will use both sides of the zipper in this tutorial.

Start with your felt.

For this bow your circle shouldn't be bigger than a quater. In fact I actually cut mine down to about a dime size. Either one works.
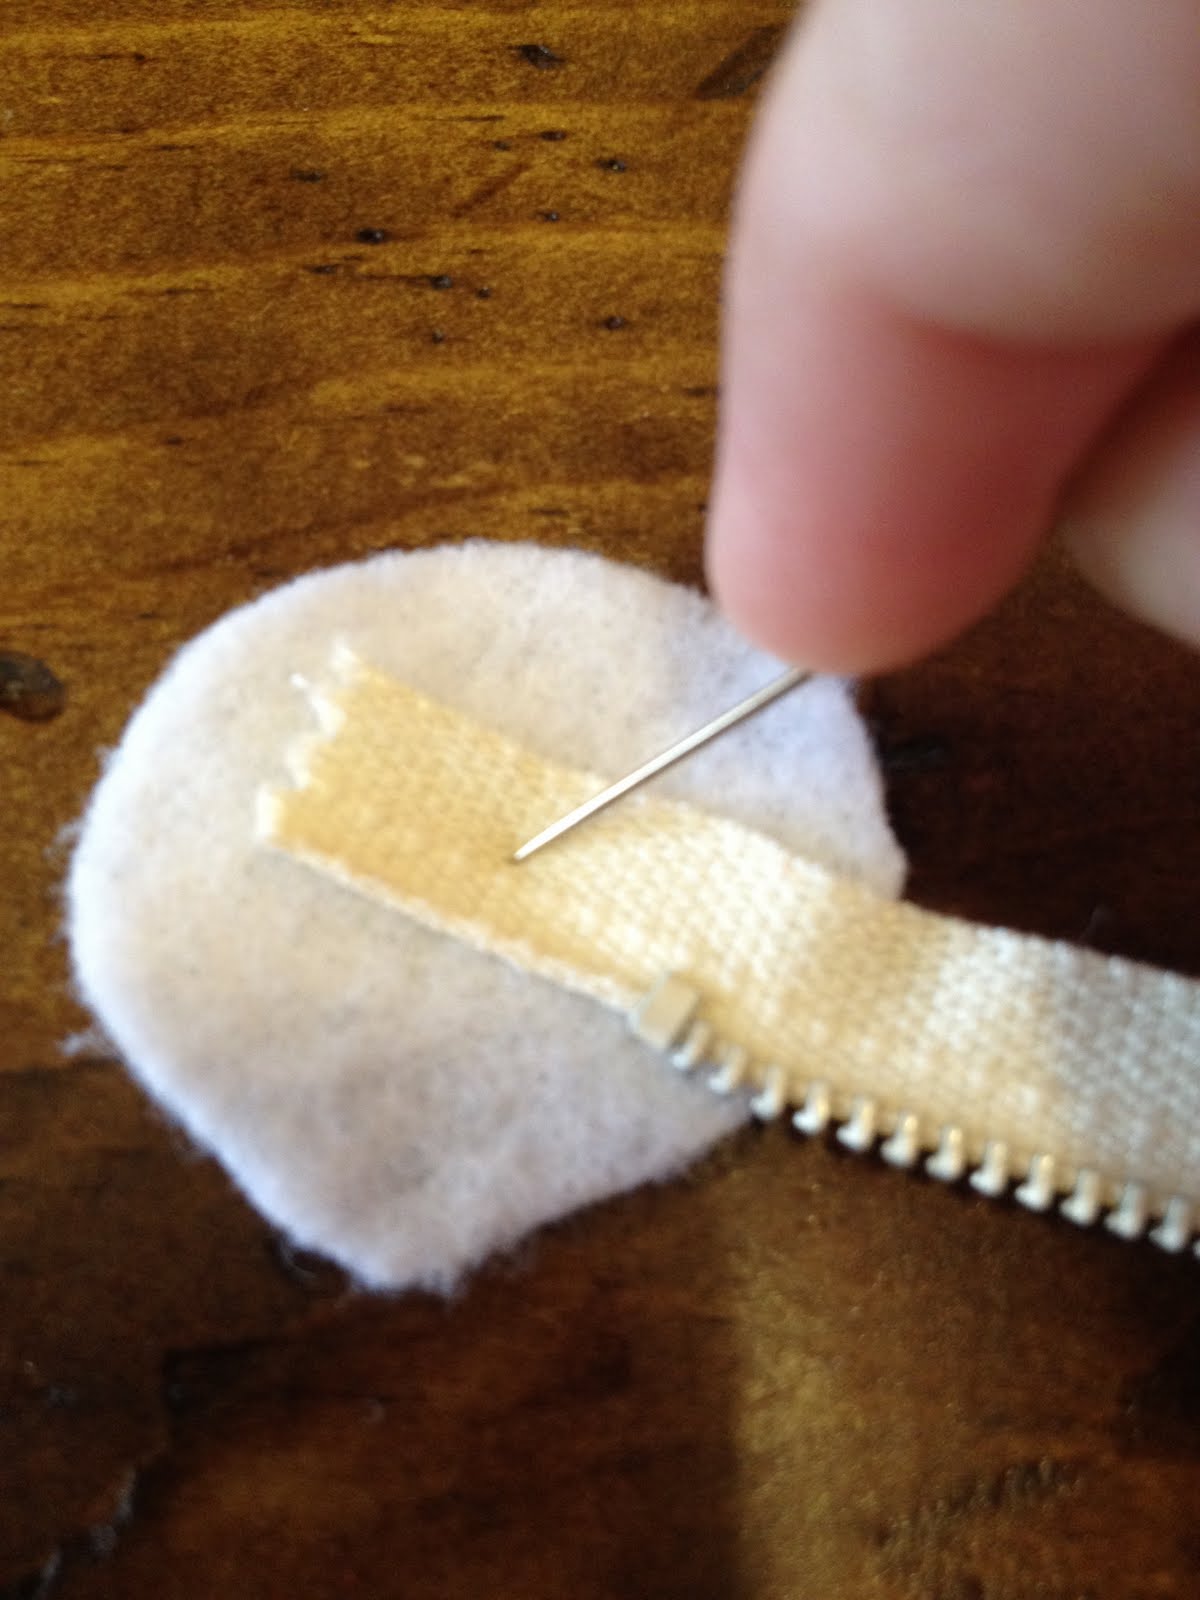
Then you will take one end of your zipper and place it in the center of your felt. Put one stitch in it. In this picture I made my first needle insertion through the top and found that once I made a full stitch and came back through it got in the way of what I was doing. So I am going to suggest you make your first needle insertion through the bottom side of your felt. One full stitch means that you will go up and through from the bottom of your felt and then back through top to the bottom keeping your needle and thread out of your way. After securing your zipper to your felt. play around to see how many petals you can make with the length of your zipper. I usually try to make about five.
After you know how big you want your petals to be make your first petal loop and secure it down with a stitch.
Make your second petal straight across from the first and secure it down with a stitch.
Then you will make your 3rd, 4th, and 5th petals. Securing each down with a stitch. I have included picture so you can see how I did mine.
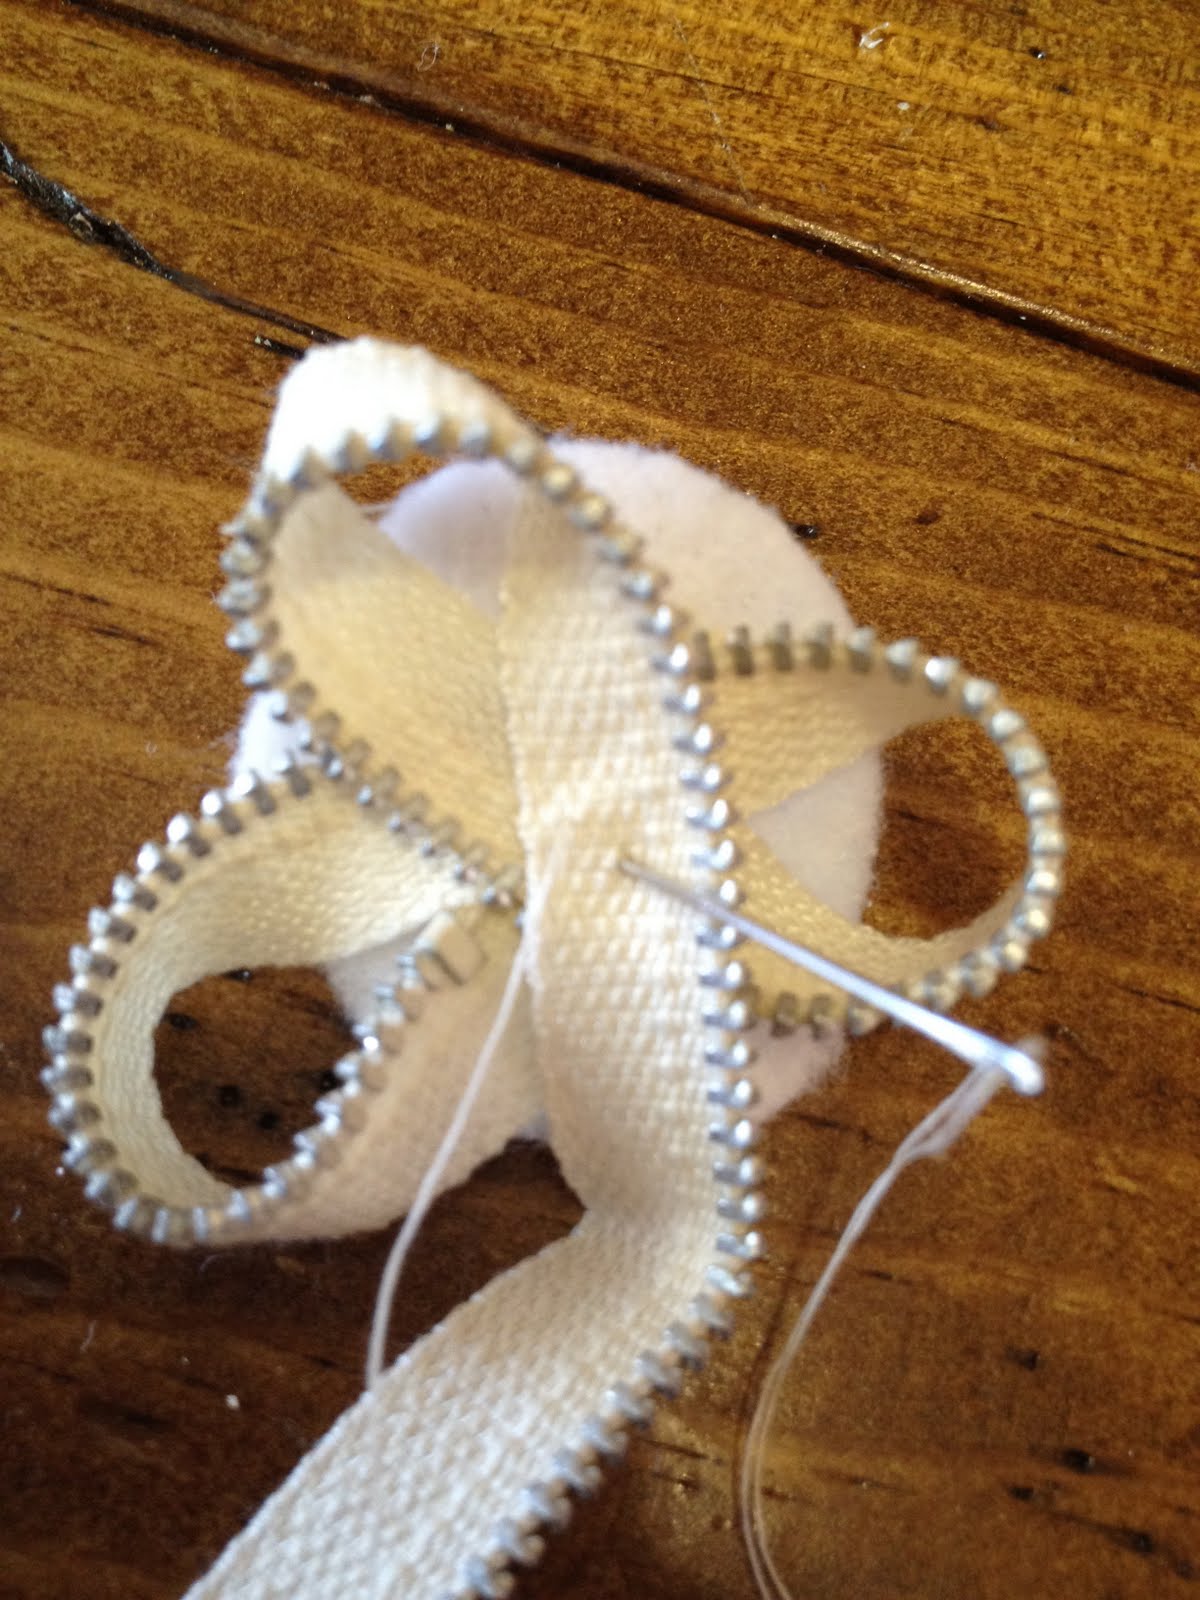
3rd petal

4th petal

and 5th petal.
Now you are going to tie off your thread to the back of your felt. If you know how to tie it off skip the next two pictures. If you don't keep reading
Put your needle through a small piece of felt and DON'T pull it all the way through.
stop when you have a small loop like this and pass your needle through that loop and pull it all the way tight. Do this 2 or 3 times to make sure it's secure.
Trim up the felt on the back side of your bow if you need to. You don't want to be able to see any of the felt when you are looking at the front of your flower.
Now turn it over.

Your petal should look like this.
Cute off the excess zipper.
Now we will start on your second petal layer
Continue all previous steps, making each petal and stitching it down until you have 5 petals EXCEPT this time you will want your petals to be just a tiny bit larger than your first row of petals you already made.
You will end up here. Cut off any excess zipper. Then put a glob of glue in the center of your 2nd layer of petals and place your first layer on top. TIP: when positioning my first layer on to my second layer I like to make sure none of my petals are directly laying of top of each other. This way the flower looks more full and like it has more petals.

Ok I am really sorry I didn't take as detailed pictures for this set of instructions but to be honest I don't think you need them. At this point you will have two layers of zipper petals with no center. Your next step is to pick out your center.

Whenever I need a center I go and grab my craft jars. In these jars, which of corse came from a garage sale, I keep all my buttons, old jewelry, broken necklaces and anything else I think would make a cute center for a hair piece.
Dig through your stuff and find a center piece you like! If it's a piece of old jewelry, for example, an old clip on earring or an old lady pin you will have to take wire cutters and cut off the back so that it will lay flat on your bow. Mine was a button that had some sort of fastner on the back of it, which I clipped off. After you find your center glue it on.

Now you can add lace if you want. The lace I used for this particular bow came from an old black bird cage veil I found at a garage sale. Here is a picture of it on Jaysa's head

When attaching lace I either cut a circle and simply glue it on the back (I usually make several layers) or I cut out a large piece in no particular shape. In fact, I usually pick up the lace with one hand so the lace is dangling and cut a piece a few inches below where I am holding it. This way my cut is totally random. Then I bunch it up bringing all loose ends to the center and glue them together. Sometimes its cute to leave some loose ends out! Totally your preference!

Now for the feathers. You can use any feathers you want, I used peacock feathers. You can place them in anyway you want to or use as many as you want just glue them to the back. Make sure they stick out far enough so that they can be seen. (you don't have to glue them smack dab in the center) After adding all the embellishments you want You will need to add an alligator clip to the back of your bow. Click here for that tutorial. After you have done this you are done and now have a cute zipper bow!

Remember, sometimes feathers can be expensive depending on the type. When your garage saleing keep an eye out for them!

Here is where my Peacock feathers came from!
Don't worry I had the same reaction! When my mom brought this to me I just looked at her like "what the heck is that?" Then she said she bought it so that I could take it apart and use the feathers. She bought the mask for .10 cents at a garage sale and since I am pretty sure I am not going to a mascarade ball any time soon I had no problem taking it apart. To be completely honest, I am not sure how expensive peacock feather are to buy in the store but I am sure it's more than .10 cents!


Zipper Bow Tutorials Part One: White Flower Zipper Bow

ZIPPER BOW TUTORIALS PART ONE:
WHITE FLOWER ZIPPER BOW
Remember zipper bows are cute on adults too!

For this tutorial you will need:

small circle of felt (no bigger than a quarter)
scissors
zipper (I like to use a longer zipper on these kinds of bows. It's possible with a shorter zipper but much harder)
Needle and thread
Glue gun and glue sticks
A ribbon lined alligator clip (click here for tutorial)

We will start with your small circle of felt. Felt makes a great base for any bow because it doesn't move around a lot, it doesn't fray and hot glue sticks to it really well.
For this bow your circle shouldn't be bigger than a quater. In fact I actually cut mine down to about a dime size. Either one works.
Then you will take one end of your zipper and place it in the center of your felt. Put one stitch in it. In this picture I made my first needle insertion through the top and found that once I made a full stitch and came back through my thread got in the way of what I was doing. So I am going to suggest you make your first needle insertion through the bottom side of your felt. One full stitch means that you will go up and through from the bottom of your felt and then back through top to the bottom keeping your needle and thread out of your way. After securing your zipper to your felt. play around to see how many petals you can make with the length of your zipper. I usually try to make about five.
After you know how big you want your petals to be make your first petal loop and secure it down with a stitch.
Make your second petal straight across from the first and secure it down with a stitch.
Then you will make your 3rd, 4th, and 5th petals. Securing each down with a stitch. I have included picture so you can see how I did mine.
3rd petal

4th petal

and 5th petal.
Now you are going to tie off your thread to the back of your felt. If you know how to tie it off skip the next two pictures. If you don't keep reading.
Put your needle through a small piece of felt and DON'T pull it all the way through.
stop when you have a small loop like this and pass your needle through that loop and pull it all the way tight. Do this 2 or 3 times to make sure it's secure.
Trim up the felt on the back side of your bow if you need to. You don't want to be able to see any of the felt when you are looking at the front of your flower.
Now turn it over.

Your petal should look like this.
Now at this point you can do one of two things. You can cut off the excess zipper and put a cute button or old piece of jewelry in the middle like so...
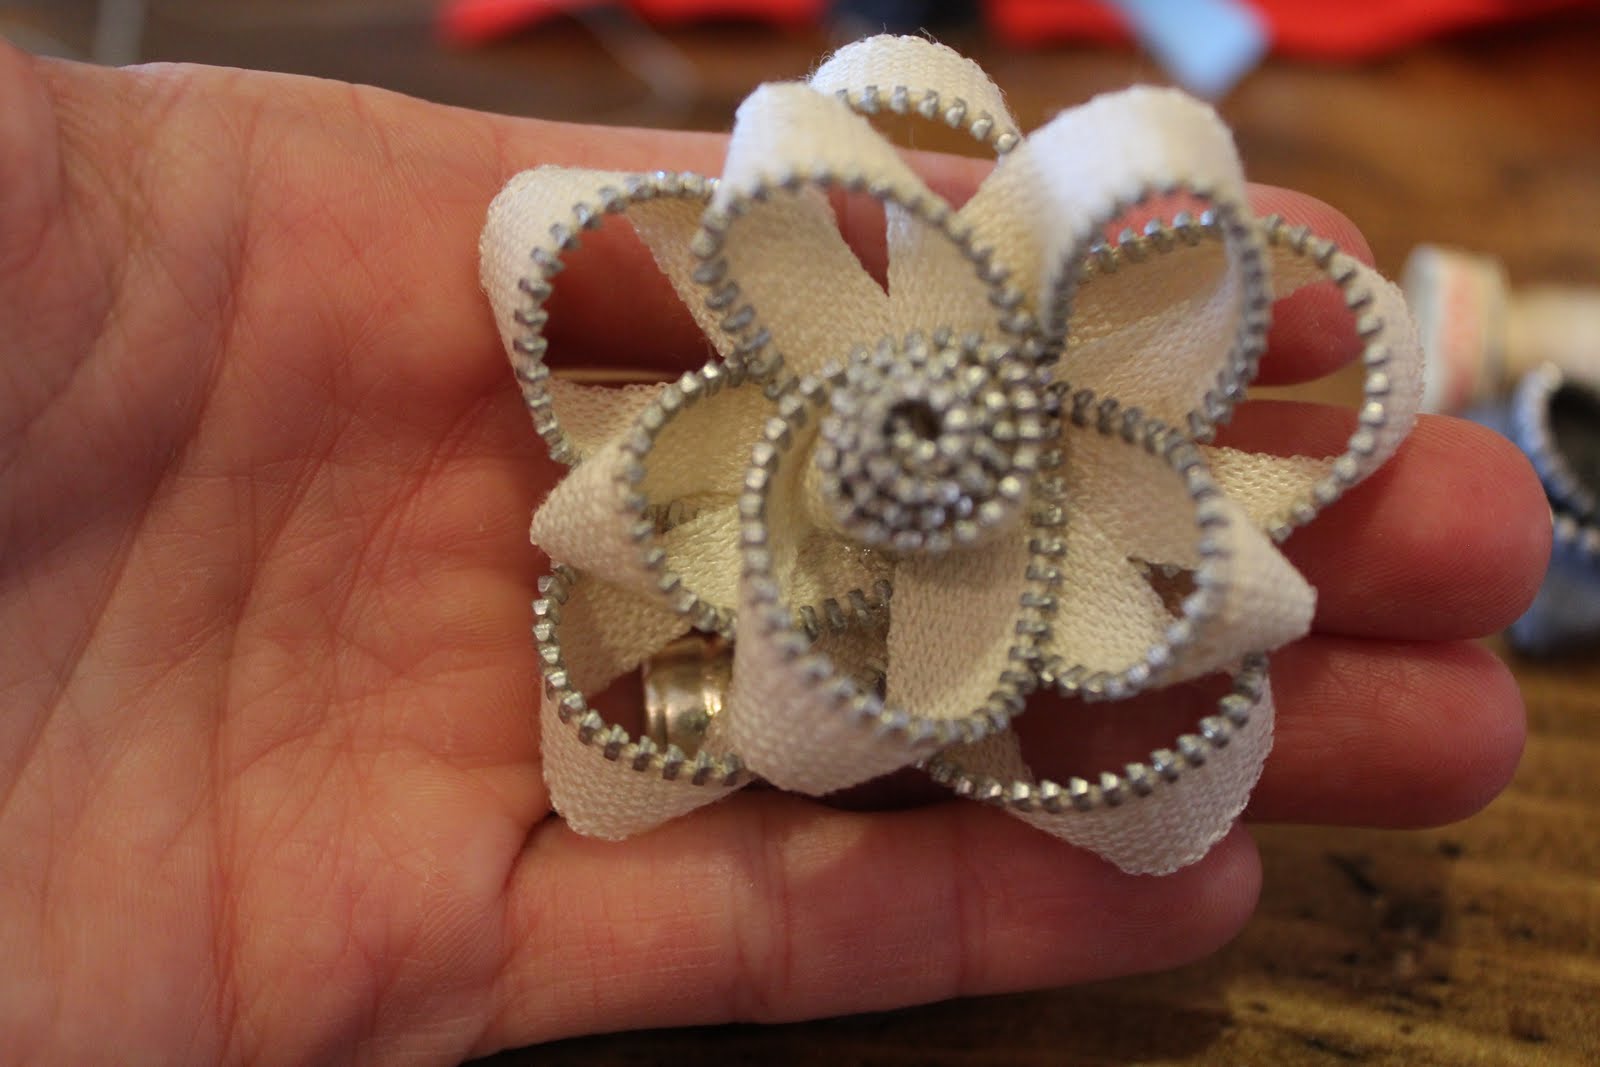
or you can roll the excess zip to make a zipper center like this...
If you want to make a rolled zipper center take the opposite end of the zipper you have been working with, shown here...
and begin rolling it toward the center. Every turn you make put a small dot of glue from your glue gun so that it stays in place.
Once you have rolled it as much as you can it will look like this
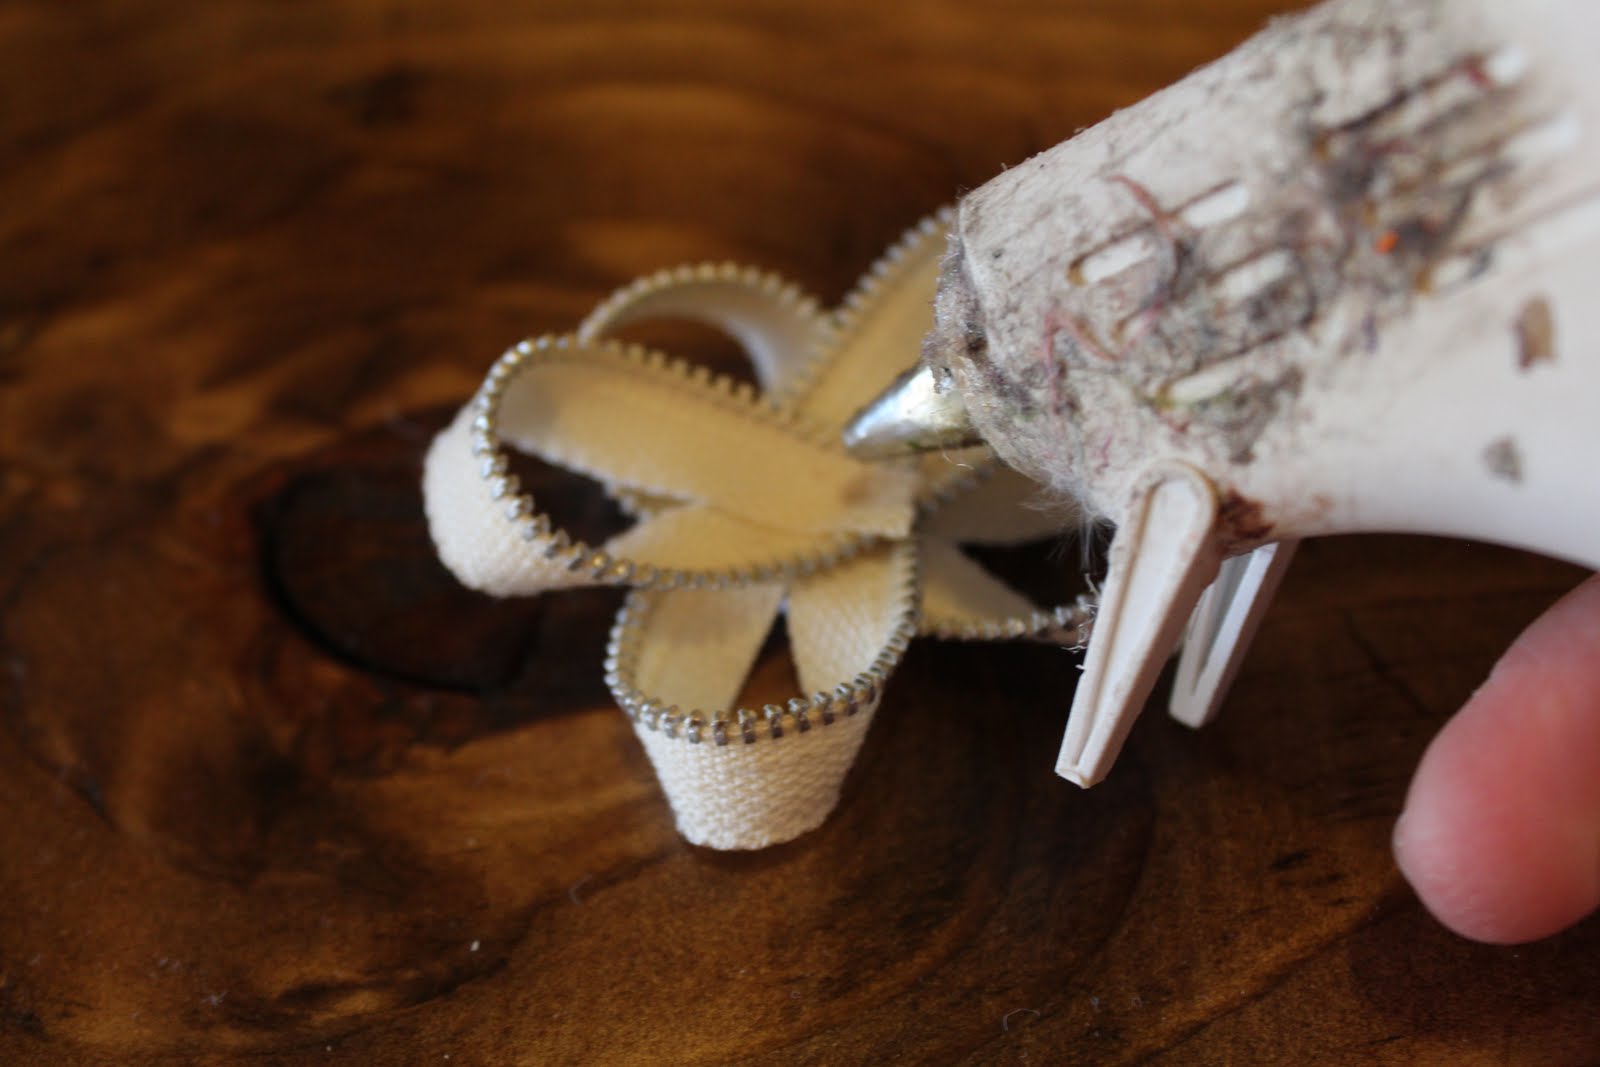
Then you are going to take your glue gun and put a glob of hot glue in the center
Try too make sure the side of your zipper bow does not touch the glue until you are ready. Once you have your glob of glue take the end of the zipper that you rolled and twist it so that the teeth are facing you and the end with no teeth is in the glue. It should be standing straight up.
Your bow should now look like this...
Cute right? You can either leave it how it is if you like it or you can add another layer of petals. At this point I thought my zipper flower needed more so I decided to make another layer of petals. So you are going to start all over with a small piece of felt, the other half of your zipper and your needle and thread.
Continue all previous steps, making each petal and stitching it down until you have 5 petals EXCEPT this time you will want your petals to be just a tiny bit larger than your first row of petals you already made.
You will end up here. Cut off any excess zipper. Then put a glob of glue in the center of your 2nd layer of petals and place your first layer on top. TIP: when positioning my first layer onto my second layer, I like to make sure none of my petals are directly laying of top of each other. This way the flower looks more full and like it has more petals.
This is what your end result will look like!
If your want you can further embellish it will lace and feathers but since these were the only zippers I had that did have metal teeth I decided to leave them. Now you will need to add an alligator clip to the back of your bow. Click here for that tutorial

Cute as can be!


Zipper Bow Tutorials

ZIPPER BOW TUTORIALS
Zipper bows are a fun way to dress up and accessorize your children and yourself!
In this next tutorial I will show you how I made these four bows from zippers my mom picked up for me at garage sales for a few cents a piece. Since I am showing you how to make each bow I will divide the tutorial into several smaller posts to make this tutorial a little less overwhelming. You will start with the same set of instructions for each bow, which I have posted below. You will also need to know how to line your alligator clip with ribbon. (Click Here) for that tutorial
To start I went into my craft box where I keep the zippers my mom gave me. This is what I found. Lots of colors, but I am not going to lie I was a little disappointed in my selection. What makes zipper bows so cute is the big metal teeth. As you can see all of my color zippers have plastic teeth that are the same color as the zipper. Nevertheless, I was going to work with what I had and make them cute.

As I said, your first few steps for all the zipper bows are going to be the same so here they are...
Make sure your zipper is zipped up. Then you are going to cut the opposite end just above this large metal piece, I call the "stopper". TIP: try to cut in between the teeth so that you don't risk messing up your scissors.
Then zip your zipper down until the actual part you hold onto comes off. Now you will have two separate sides of your zipper. We will be using both for all of these tutorials.


Whatever bow you decide to make just remember that every bow looks cuter on someone's head! There have been so many times that I have made a bow and thought I didn't like it but after trying it on one of my girls I LOVED it!

For the white flower zipper bow click here.

For the peacock feather zipper bow click here.


For the circle flower zipper bow click here.

For the zipper, fabric combination flower bow click here.

Wednesday, January 25, 2012

Quick and Easy Redo

QUICK AND EASY REDO
I was going through my Valentines decorations when I ran across these. I bought these last year at a garage sale for $1! Not $1 a piece. ALL of them for $1! I knew I wanted to repaint them and it would be a quick and easy job but just didn't have time so I shoved them in a box and forgot about them. Now, a year later I knew exactly what I wanted to do with them.
So I gave them a makeover. I painted them white.
Normally I would have done a primer first but ran out of it on another project so I skipped that step.
After putting several coats of paint on them I roughed up the edges with a low girt sandpaper.
Then put some dark gray glaze on them
and wiped it off in certain areas to show off the details.
Here is my finished product. I never even realized one was different until I was done! I am going to be putting these up in my girls' bathroom. However, I am waiting on a shelf to be made so for now I am going to throw them in with the rest of my Valentine decor.

Here's a Sneak Peak of my next project!

Monday, January 23, 2012

Fashion on a Dime

FASHION ON A DIME

Jaysa Sue
Jaysa's jacket I bought at a garage sale and the tags were still on it! I can't remember how much I paid for it. I don't believe it would have been more than $3 dollars. If it was I wouldn't have bought it. Her jeans are from the Children's Place and were bought at Savers for $3.99.
Close up of her cute jacket.
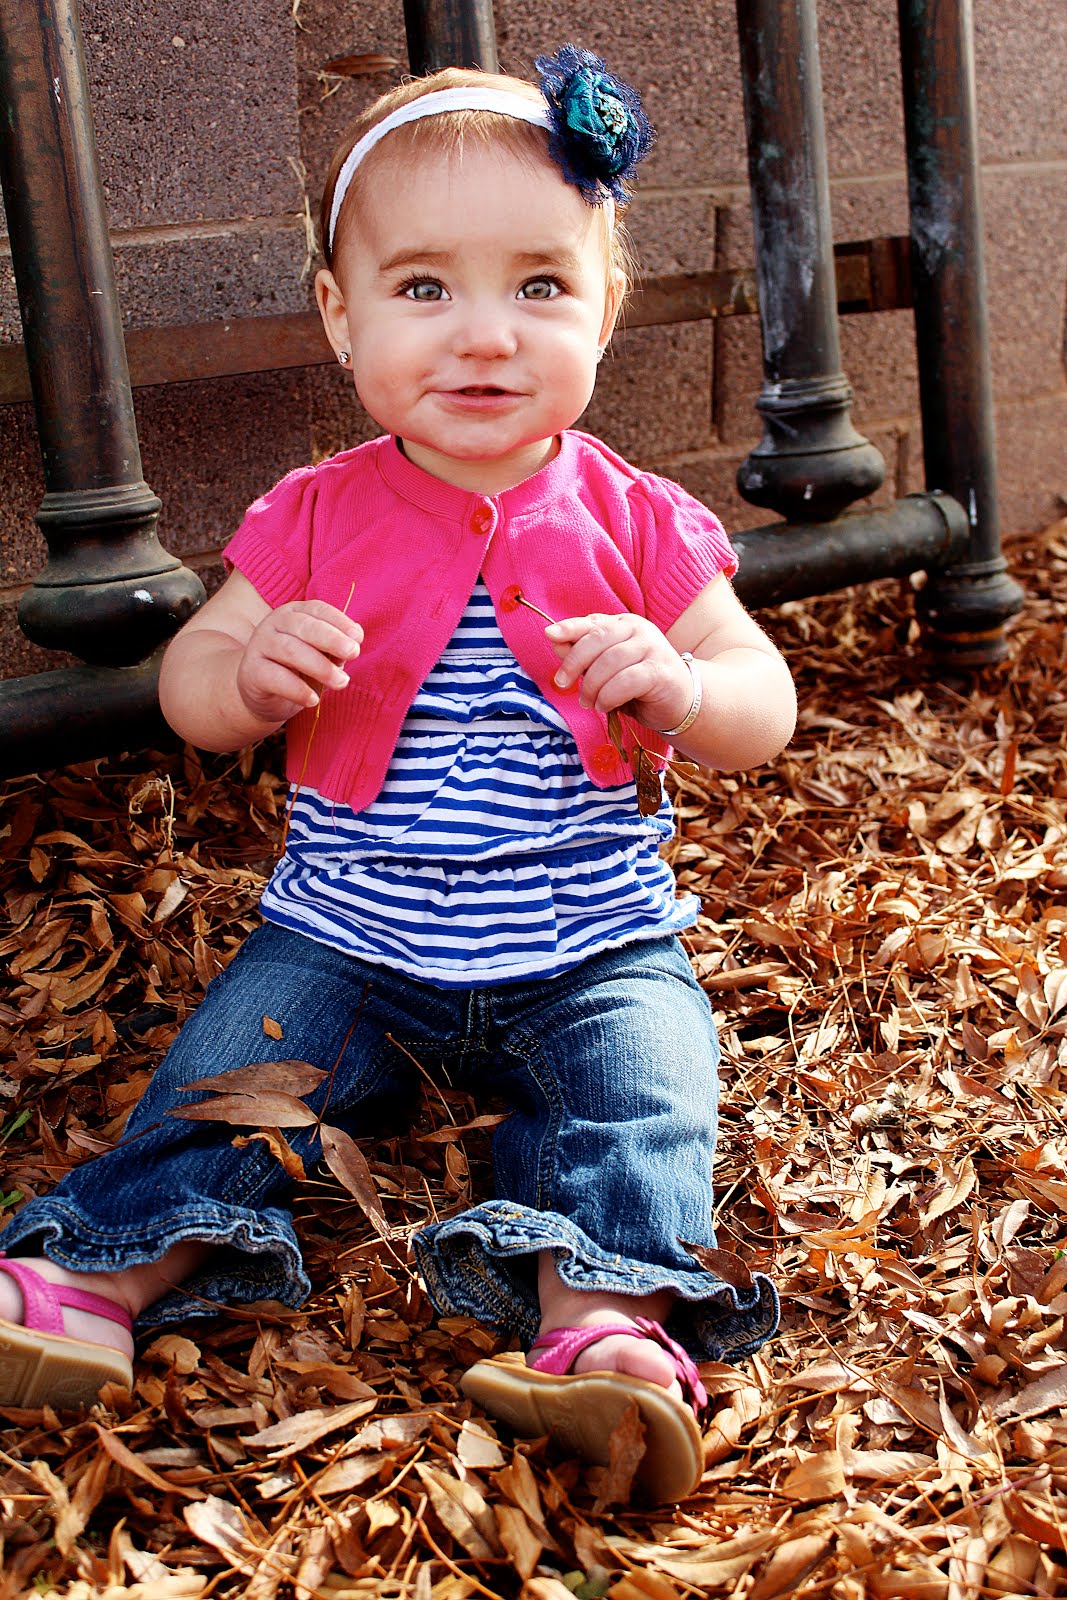
Jaysa's bow is made of things found at garage sales. My mom found a bunch of old zippers and let me have a few to make little girls bows with. She also bought the feathers for me at a garage sale and the button I found in a big bag of old buttons I bought from an older couple. (tutorial coming on zipper bows!)

Paisley Mae
Her cardigan is from Savers I can't really remember how much I paid for this one either but it wasn't more than a few dollars. Her shirt I bought at a garage sale for .50 cents. Her jeans were $5 on clearance at Children's Palace and...
I paid .50 cents for her shoes at a garage sale!

Paisley's bow was made from fabric, lace and old jewelry I found at a garage sale also.