TutorialsPhotobucketSponsorsPhotobucketPhotobucketPhotobucket

PhotobucketPhotobucketPhotobucketPhotobucketPhotobucket
Photobucket Photobucket Photobucket Photobucket

Monday, January 23, 2012

Painting your Paintable Wallpaper


PAINTING YOUR PAINTABLE WALL PAPER
No I didn't find my paintable wallpaper at a garage sale, although I have seen some before. I thought this was a good opportunity to show you all how I gave my wallpaper in the center of my fireplace a faux bronzed ceiling tile look.
Here is my before picture of my fireplace. As you can see, it needed some help. When I bought this fireplace at a garage sale we had not yet bought our house. I had always pictured my home having a fireplace so I took a chance and bought it anyway. After finding a home we loved you can imagine my dissapointment when a fireplace was not included. I was unsure about what I was going to do with the one that was sitting in my garage! Once we moved in I decided that not everything had to be practical. I could have a fireplace that was purely decorative if I wanted. So up it went. But what was I going to do with the blank wall where my fire should be burning? I couldn't just leave it bare. I thought about little tin ceiling tiles but knew they would be too expensive. Then I found paintable wallpaper and thought it would be perfect. I bought my paintable wall paper at Lowes because I really loved one of the patterns they had. In hindsight I wish I would have bought my wallpaper online at this website called Wallpaper Wholesaler. The wallpaper is much cheaper on this website however they are sold in double rolls so you have to buy two of them. I have another paintable wallpaper project that is pretty big so this would have been a better bet for me. If your paintable wallpaper project is small you may prefer to buy your paper at Lowes. The particular wallpaper I chose from Lowes covers 56 square feet and was a little under $20. On the Wallpaper Wholesale website most rolls were $12.99. But remember you have to buy two which means you would be spending $25 plus shipping.

So now that I had my paintable wallpaper I had to figure out how to give it the best look. I loved this two toned look.
I thought I could recreate this look with some of the paints I already had at my house so I went out to the garage and got the paint we used in my youngest daughters bedroom. Before you put your wall paper on your wall always test out your colors and painting techniques on a strip. Paintable wall paper comes off the wall easily but I didn't want to waste any.
I used a medium brown as my base coat.
And a Martha Stewart Metallic paint as a top coat to give my paper more details and definition. I think this was about $6 at Home Depot.

When you are choosing your paint color, I would suggest that you use two colors. If you just simply want the metallic look without any other color showing through I would still suggest using a plain base coat that is really similar to your metallic color. Paintable wallpaper is really dense, which means it takes a lot of paint to cover your first coat. Depending on how big your project is you may not have enough metallic paint to cover the whole thing without using a base coat. If your project is small enough you could also just buy a sample paint of your base coat instead of an entire quart to keep your cost down.
One more piece of advice when your shopping for your paintable wallpaper is to try to get paper that already has adhesive on the back. This will save you time and money. After following the directions on how to apply the paper (we soaked ours in the tub to get it all wet at the same time) we put it in the center of our fireplace. I was really surprised at how easy it was to work with. We were able to place it on the wall and slide it around to make sure we had it in the right spot.
C.J. making sure the pattern lines up.
The directions say to wait 24 hours before painting....oops i didn't read that part. I let mine dry overnight and then painted it and it worked out just fine. Don't forget to tape off your area so you don't get paint where it's not supposed to be!
Here I am painting my base coat.
My base coat after drying
After it's dry take your metallic paint and lightly brush it on top of your base coat allowing some of your base coat to still show through. Sorry about the blurry picture
Letting my metallic top coat dry.
Here is the difference between using one color of paint and lightly brushing a second paint color on top of your base coat. Major difference! With my next paintable wallpaper project I think I will go a step further and VERY lightly brush a third gold metallic paint on top of my browns. Remember, you can use however many colors you want!
The finished product! I love it!
All decor was bought at garage sales! I paid $75 for the fireplace, $17 for the metal embellished mirror and $15 dollars a piece for the large wood sconces!

and I still have lots of wall paper left over!
I am linking to these parties:


DIY projects and crafts

Sumo's Sweet Stuff


Sunday, January 22, 2012

Fashion on a Dime

FASHION ON A DIME
What determines fashion? Have any of you ever thought about this question? Fashion comes in so many different styles and can be expressed in so many different ways but where do we get these style ideas? I have come to the simple conclusion that designers have an idea or image in their head that they then put on paper and finally into fabric according to what they think will become fashion. From there, companies within the fashion industry buy based off of these designer's style creations. Companies buy according to what intrigued them and what they think will catch on in the public. These styles from the runway then trickle down into our department stores in forms that are much more afforable to the public. You go to those stores and pick out what you as an individual like and what you think you will look good in. But what if you are not shopping at those department stores? What if you are like me and you find the majority of your clothing at D.I., second hand stores and garage sales? To be honest it doesn't really matter. Fashion trends always end up repeating themselves or end up being tweaked in different ways. Remember when you wore leggings as a kid? Or those skinny jeans and jean jackets? How about those bright colored pants your mom wore? Guess what, they are all back. Fashion trends also stick around for years so they have time to trickle down even further into second hand stores. The only difference is that your shopping in a place that offers several decades of styles to choose from. You just have to know how to assemble these styles together in order to appear fashionable. The truth is that we are all our own designers. We may not physically make the clothes but we are, what I like to call "the assemblers". You get to show your creative side when determining how to put these fashions together. Just remember, you determine our own personal fashion style. It is yours and no one can take that away from you. Find out what your fashion style is and own it. Be confident in it! With this being said, I know that we all have different styles and that not everyone will like the outfits I assemble myself. However my purpose is not for you to like everything I wear but to show you that you can buy from second hand stores and garage sales for a fraction of the price and still be fashionable!
Here is an outfit I put together from things I have found at D.I. and garage sales. The shirt and vest came from D.I. The shirt was $4. The vest was $3. My hand bag also came from D.I. and is a Daisy Fuentes bag that I paid $2 for. My bracelets are from a garage sale and cost me about $1.50.

I also find the majority of my children's clothes at garage sales. Kids fashion is much easier to find at second hand stores and garage sales than adult clothes are because kids are always growing. Eventually they don't fit into that outfit you paid a fortune for and when that happens what do you do? You either save it for the next kid, you garage sale it or take it to a second hand store. This makes your job easy as a parent when it comes to finding cute affordable clothes for your children!
Here's is my miss Jaysa.
Her shirt is from Savers. I think I paid 2.99 for it. I bought the vest at a garage sale for $1.
Her pants are kids True Religion jeans that I paid $3 dollars for at a garage sale and her shoes were also $2.99 at Savers. Her total cost for her outfit is $10! Thats a $1 DPWF.

Paisley
Her white onesie was .25 cents. Her pink cardigan I found at Savers for $1.99 and her ruffle skirt legging combination I bought at a garage sale for $1.
How cute are these shoes!!!! $1 at a garage sale! Her total cost for this outfit is $4.25. We will round up for a .43 cent DPWF!
Her bow is also made from crafts materials, feathers and flowers I have found at garage sales!

Saturday, January 21, 2012

Well Look at That!

WELL LOOK AT THAT!

Do these look familiar? I found these at the Boulevard Home Furnishings store, which is a pretty high scale furniture around here. These are just a little bit different than mine. The metal is brushed in gold and my wood base is bigger but check out the price tag on these!
I could not believe my eyes when I saw how expensive these were!
To be completely honest I like mine much better. I am not a fan of the brushed gold.
Here is a picture of mine.


When it Rains

WHEN IT RAINS
When it rains there is no guarantee on what you are going to find when you get out to garage sale. There are some days that I still get up and drive around to see if I can find anything and other days that I just decide that it's not worth it. Cold and rainy is the worst combination for garage sales. Your chances of finding anything are much more slim when it's cold and wet than if it's raining on a warm summer morning. Today was one of those cold and rainy days. Because of this weather many of the garage sales were canceled. I spent a total of $1.50 today. I remember one weekend a few years ago it was so bad that I spent .25 cents the entire day! If you are having one of these days don't keep driving around and wasting your gas! Go home! This happens every once in a while. Sometimes it's just not your day. Just keep in mind that if you do get out there on a rainy day your garage sale morning may turn into a scenic drive instead of a morning full of bargain hunting.
Our scenic drive this morning.

1/21/2012

1/21/2012
Today we woke up and it was pouring rain. Rain puts a serious damper on the garage sales but we decided to get out there anyway and see what we could find.
ROBIN'S FINDS
I bought this little toy for $1. I found it at kmart.com for 19.99! Click here to see. Paisley has a birthday coming up so it will make a good birthday gift!

With Valentines coming up I want to put up a few holiday decorations around the house. Garage sales are the perfect place to find these decorations. These ones aren't the best but I think if I tweak them a little bit they will look really cute. I spent .25 cents on each.

OTHER AWESOME DEALS
Even though they are old these antique windows can still be pretty expensive! This guy only wanted $15 for these!
There are so many cute ideas using old windows. Here are a few I pulled off Pinterest.

I love the idea of using old windows in your home decor. I have my own old window project I will be getting started on soon!
Sesame Street DVD. I get all of my DVD's from garage sales and we have TONS! Lots of Sesame street, Barney, Dora, Disney. I don't normally pay more than 1 dollar for mine unless its one that I know Jaysa will love. When buying DVD's also remember to ALWAYS look at the back of the DVD to make sure there aren't too many scratches on it. I have made this mistake several times.

Tinkerbell dressup- $1. Sorry it's a blurry picture. If you have little girls you know how expensive dress ups can be. My girls have an entire dresser full of dressups I have found at garage sales. I don't pay more than $1 for them.

Ok. I know this is a pitiful picture. However again, it is so easy to find holiday decorations at garage sales! This was a really big wreath. It came up to my hips and is prelight. The decor on the wreath is ugly but with a little TLC it could look beautiful! I tried to talk my husband into this one but he said no. The guy only wanted $5 for it! We would have had to strap it to the top of our car cause it was so big.

I wanted this SO bad! I LOVE this antique bed. I really like the idea of making a bed into a bench for my front porch like this
BUT the guy wanted $90 for it. I asked him if he would go down and he said he would go to $70 but that is still too much for me. I got his number and asked him what he was going to do if it didn't sell. He said he was going to put it on craigslist. Maybe I will keep an eye out for it and see if he will go down on it later if it doesn't sell.

So for the entire day all I bought was the Vtech turtle toy and the Valentines decorations. I spent a total of $1.50. Wish the day had been better but I wasn't expecting much because of the rain. To make our bad garage sale day worth while we all went to breakfast!
Me and Jaysa
Paisley and C.J.

RE-STORE
We also headed to our local Re-Store, which is another place to find great deals. The Re-Store is like a D.I. or Goodwill but for building materials. Everything is donated and is pretty inexpensive. They have everything from doors and windows to
roofing tiles...50 cents a piece
bath tubs
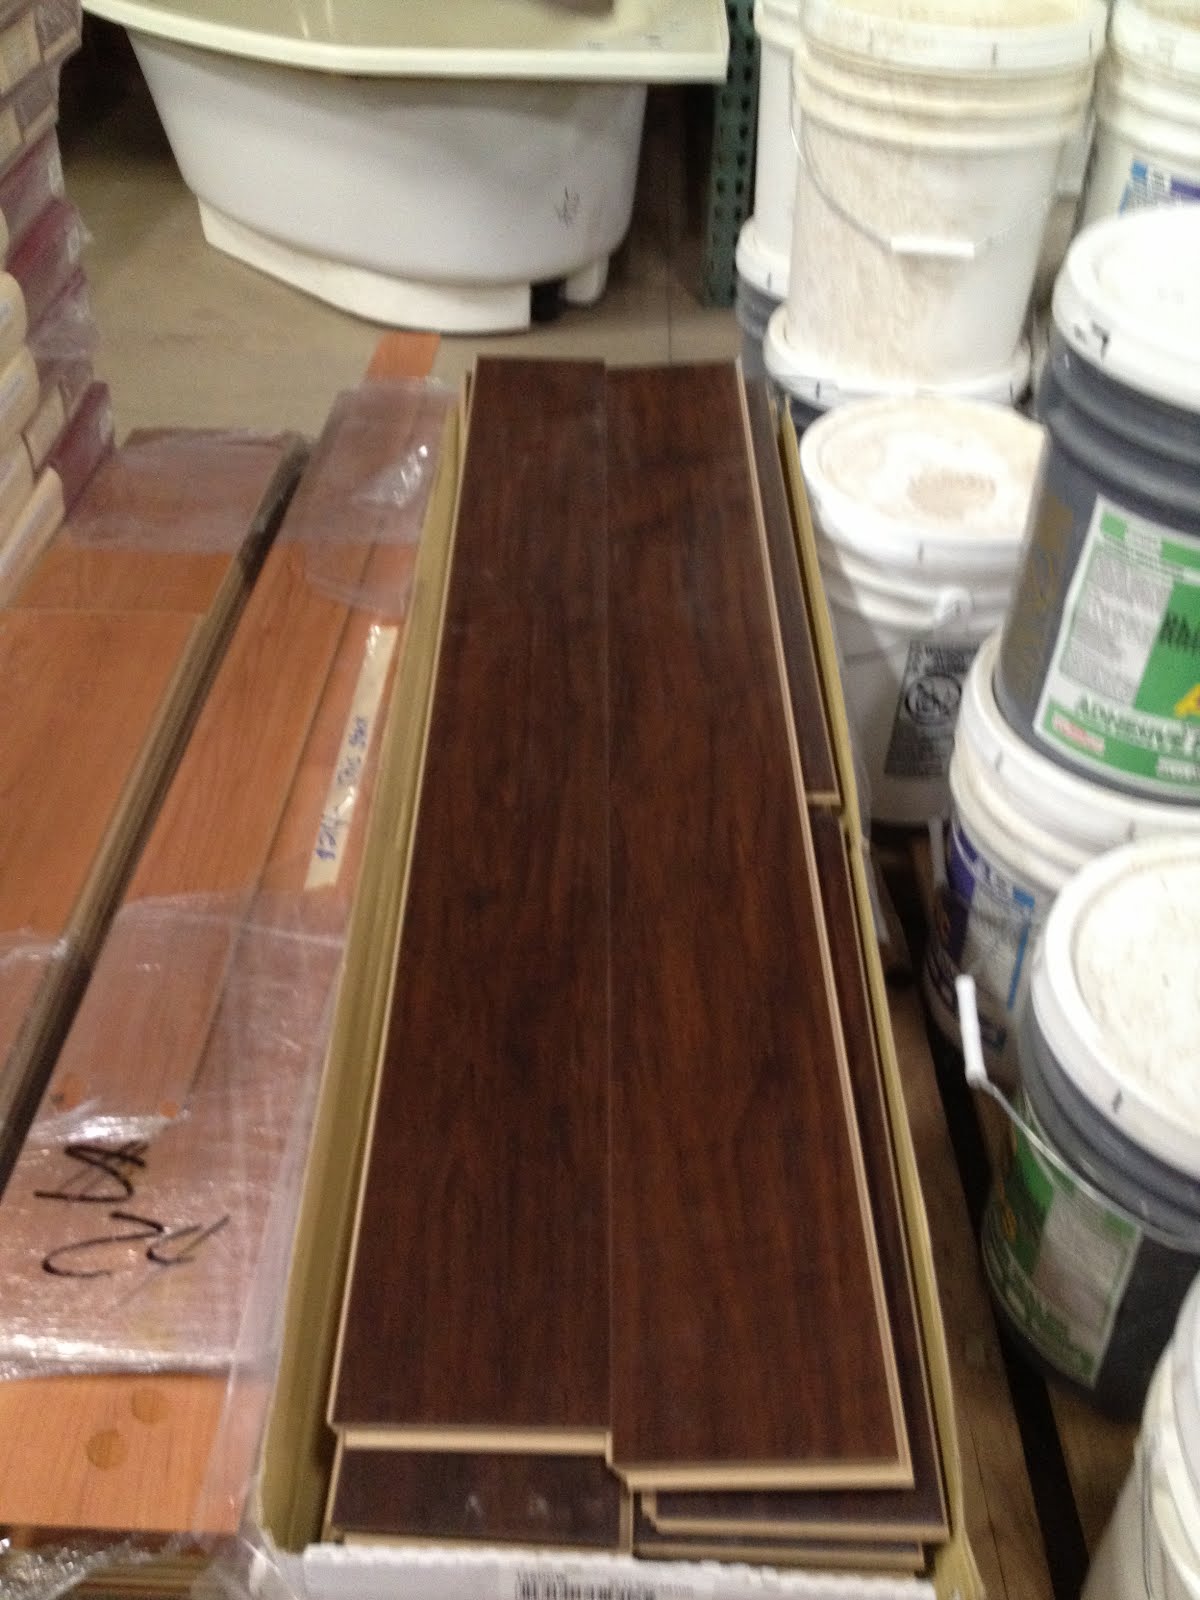
LOTS of flooring
sinks
toilets
fans... These fans were all about $40
lighting fixtures....All lighting fixtures varied in price these ones were a little over $60. Still a little expensive in my opinion but cheaper than buying them new!

Just like D.I. the store is always changing so you have to check in every once in a while to see what they have!

DIY Wreath Tutorial


DIY WREATH TUTORIAL
I just finished my wreath for my fireplace and I love it!
Here is how I did it!
After finding out how much a fairly large wreath would cost I decided to make my own. I found this wreath at Tia Pan. I was so excited because it was exactly what I wanted but then I looked at the price tag. OUCH!

So to make it more budget friendly I headed to D.I. to see if I could find a wreath I could pull apart or one that had not been decorated yet. The first time I went I found this one for $2 and planned to pull the berries off and redo it. After getting the berries off I decided it was not big enough. Don't worry I have a different plan for this one.

So on my second trip to D.I. to look at wreaths I found this for $4.
This was perfect! I could could shape it to the exact size I wanted because it was just a twig vine.
Here is was I would have spent on my wreath base if I had bought it at the store.

So after shaping it I tied it in several places with craft wire like this
Now time for the greens. Sometimes you have to realize when finding a certain item at a garage sale isn't really all that realistic. I hadn't seen any garlands like the kind I wanted for my wreath at garage sales and I was not willing to wait to see if I would it in the future so I shopped around at several places online. I found a great website called Save-on-Crafts. This website is so neat. They have thousands of products to choose from that are about half price. I found a 9ft boxwood garland for $8.50 and was about to order it but decided that I would go check my local Michael's really quick before ordering. In the end with 50% off coupons and not having to pay for shipping Michael's was cheaper by a few dollars. However, I will be checking Save-on-crafts in the future when I need something!
Here is my garland. I attached my garland with craft wire the same way I tied my wreath together. I used 3 strands of box wood garland. My total for the wreath was just over $25. Much better than $120. I almost saved myself $100 just by making it myself!

Just so you have an idea of how big this wreath is I took the wreath off my front door and placed it in front of my homemade wreath. My DIY wreath is a 24 inch wreath.

After talking to a friend I found out she was tackling the same project I was! She went about accomplishing her project much different that I did so I asked if I could take pictures and post it on my blog.
Here is her wreath. I LOVE how full it is!
She also got her garland at Michael's and used 2 6ft strands.
She took a picture frame with a flat surface and glued styrofoam on it. She then cut of sections of the garland and stuck them into the styrofoam and used hot glue to reinforce them.
What I great idea! Once she gets it up I will take a picture of it and post it!

So now with my DIY wreath finally finished I can give you a picture of my entire fireplace set up. The fireplace its self I bought for $75. The decorative mirror with the metal embellishments I bought for $17 and the two sconces I paid $15 a piece for. All were bought at GARAGE SALES! In the center of the fireplace I wanted to do some of the bronze tin ceiling tiles like this...
but they were so EXPENSIVE! They were $20 a sheet! I would have needed 6 sheets, which means I would have spent $120 on ceiling tiles. Thats more than I spent on the fireplace it's self! So I started looking for a cheaper route and found paintable wall paper.
Here is a close up of my wall paper. I am not going to lie I was pretty impressed with myself. I was even able to give it a bronze look. I will have a tutorial on how I painted it a little later so check back soon!

Monday, January 16, 2012

Garage Sale Ceiling Fan

My fan is up!
C.J. put my fan up yesterday and we love it! It makes such a difference in our room! Here's a picture of the old fan on the left and the new fan on the right. Taking old and outdated fixtures out of your house is a great way to make your home look newer. It's also a great way to increase the value of your home! Garage sales can make this process easier on your wallet! This fan was brand new. We paid $21 for it. After comparing prices I found a similar fan at walmart.com for $89.00! I can't wait to get the two bathroom light fixtures I bought Saturday up too so you can see them!